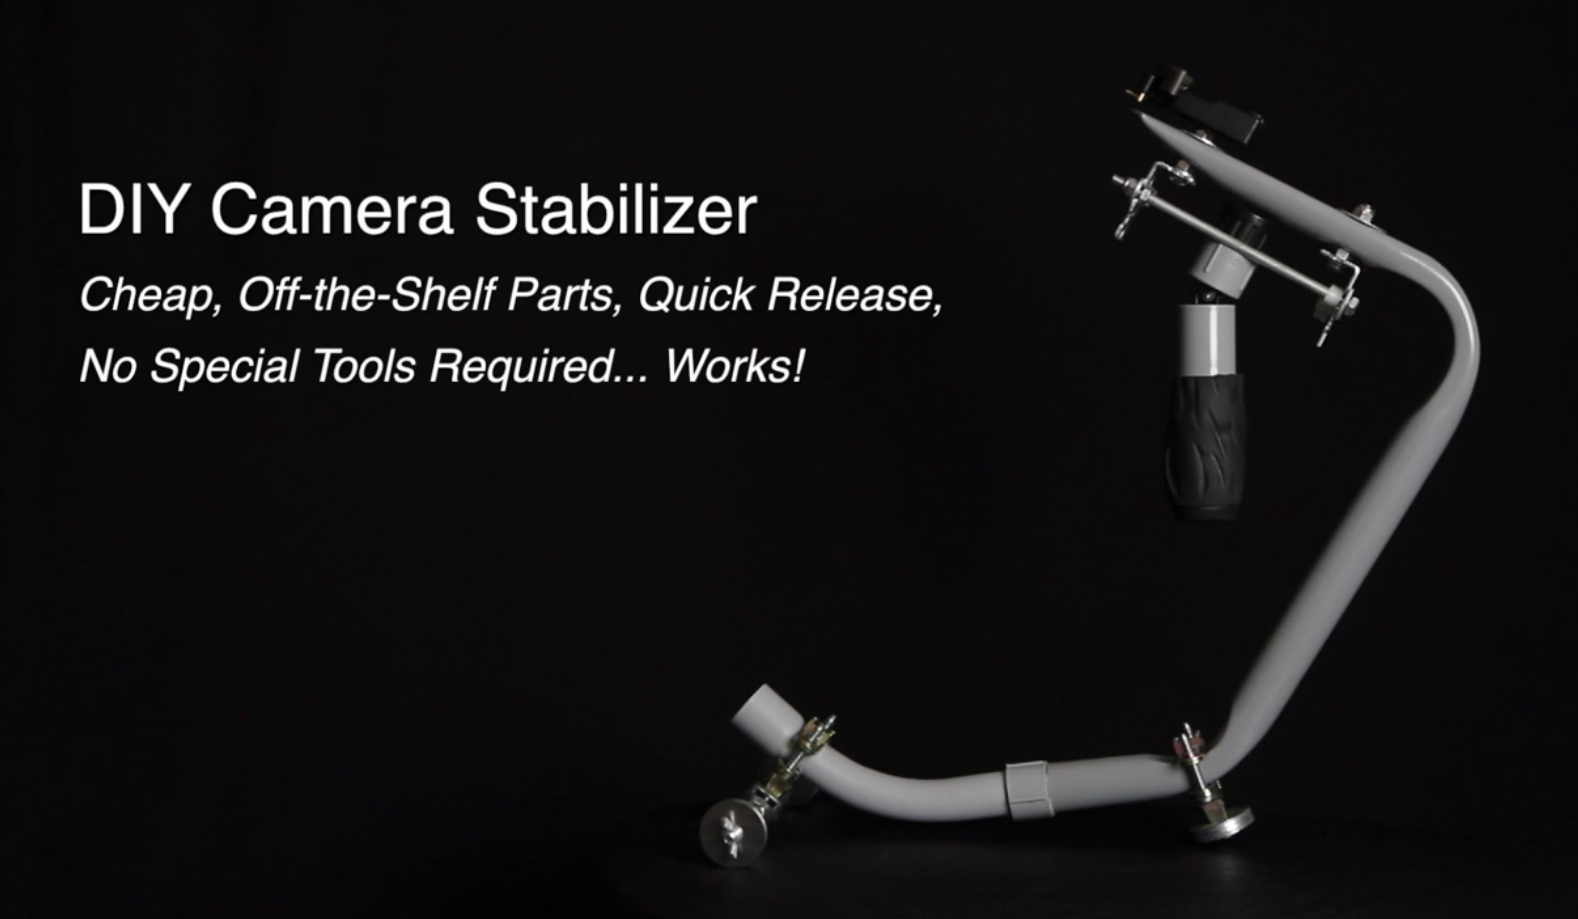
Merlin-Style DIY Camera Stabilizer/Steadicam Build Tutorial
Steadicams are like handheld tripods that hold a videocamera on a swiveling base, so that almost any movement you make is isolated from the camera. The resulting shots are flowing, dreamy, and somewhat ethereal (sorta like this).The big wheel scene in The Shining is one of the classic examples, although they used a modified system (also: the notes about the way Stanley Kubrick and director of photography Garret Brown set up the shots for that film is a fascinating read)
Large, Hollywood-quality steadicam rigs cost $60,000. Smaller professional units are available, with compact consumer level units like the Merlin retailing for a bit under $1000.
For many hobbyists, even the consumer price is beyond their budget. So people began to tinker and many DIY alternatives were developed. Johnny Chung Lee made himself famous with his $14 Steadicam website, detailing a simple design that uses a counterweighted pole to shift the center of gravity and help smooth the jitters, although it excludes the concept that makes a “true” steadicam, the gimbal.
The gimbal is a key part to the movement that defines steadicams–it’s basically the pivot point that allows the handle of the system to move separately from the camera it’s connected to. Able to tilt forward/backward, side to side, and rotate in circles, the gimbal isolates most jerking movements, except up/down. A counterweight system helps control that by increasing the mass of the whole package, so any up/down movement has a deadened effect.
The most simple gimbal construction is a cup that balances on a pin, with the camera platform attached to the top of the cup structure. More commonly, it’s made from three bearings that can rotate independent of each other. Many DIY gimbal units started off using three short segments of PVC pipe stacked into each other (from small to large diameter) and connected together other through their middles with a rod. Inside the the smallest of the pipes, a skateboard bearing is affixed that allows for the rotational movement. A photo illustrates this much more easily:

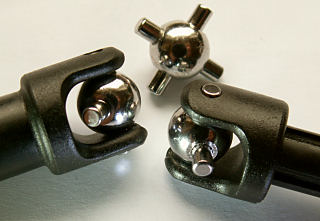
The problem with the PVC gimbal is getting precise holes drilled in the center of the pipe, and then using PVC as the rotational surface. A new technique was devised using the universal joint from an RC car drive shaft (the Traxxis 5151 seems to be the most sought after unit). Still using a skate bearing for rotation, it reduced size while increasing accuracy. A few build details on this design can be found here and here.
The beauty of these efforts is that now there are many writeups and tutorials on how to build your own mock-Merlin steadicam, at a fraction of the cost. One of my favorites is by Vimeo user StudioAmarelo, and uses parts sourced almost entirely at Home Depot, costing approximately $30. The video below steps you through the process.
MAIN BODY COMPONENTS:
2 x Electrical Ground Clamps
1 x Approx. 7″ Curved PVC Conduit Elbow
1 x Male (Threaded) PVC Adapter
MAIN BODY HARDWARE:
1 x Extra Large Ladder Hook (Approx. 15″ High x 10″ Deep)
2 x Universal Brackets, 1.5″ Wide, 2″ High
2 x 1.5″-1/4″ Flathead Screws
1 x 1″-1/4″ Flathead Screw
2 x 6″-1/4″ Bolts (Smooth Shaft)
2 x 1.5″ U Clamp
1 x 4″-Wide Double Eye Tension Rod
2 x 3.5″-1/4″ Screws (Fully Threaded)
8 x 1/4″ Locking Nuts (Nylon Locks)
4 x 1/4″ Regular Nuts
3 x 1/4″ Wing Nut Locks
1 x Zap Strap
2 x 1/2″ Washers with 1/4″ hole
2 x 1″ Washers with 1/4″ hole
36 x 1.5″ Washers with 1/4″ hole
GIMBAL COMPONENTS:
Adapted from “WSCLATER” YouTube Design
2 x Traxxas T-Maxx 2.5R – 3.3 F/R Center Driveshafts (#5151) – get on eBay
2 x 1″ (Diameter) Skateboard Bearings
1 x 1″ (Diameter) Male (Threaded) PVC Adapter (for top of gimbal)
1 x 1″ (Diameter), 1.5″ long PVC Straight Connector (No Threads, for bottom of gimbal)
2 x PVC “Shims”
1 x 1″ (Diameter) Screw-on Hose Cap
2 x Small Screw + Washer (To Mount Driveshafts to Bearings)
OPTIONAL:
1 x Manfrotto 323 RC2 Quick Release Plate (w/ 200PL-14 Plate)
1 x 1/4″-to-3/8″ Step Up Screw Adapter
1 x Rubber Bike Grip
“LADDER HOOK/STORAGE HANGER” ONLINE
**similar but with 90 degree bend on end, except for 2nd Aubuchon link that looks to be the same one I found, but sold in bulk

Hi, I'm Mike. I’m the executive editor of Make: magazine, and host of Discovery channel’s Punkin' Chunkin' and Catch It Keep It, TV shows where I build and explain crazy machines that crush stuff, blow things up, shoot fire, all in the name of science.
I've previously worked at Wired and ReadyMade magazines, writing about how to utilize new technology in our everyday lives.
This site is where I keep a list of instructions for fun projects I've done, am working on, or draw inspiration from. I encourage everyone to get involved — get up and do something!