How to Change the Tail Light on your Nissan Versa

A few days ago a friend asked me to help change a burnt out tail light on her Versa hatchback. Sure, piece of cake, right? Well, Nissan had other plans, and made it a little tricky. Here’s a step-by-step guide to getting into your rear lamp console.
How to Make a Homemade Comet With Household Ingredients, and Fun Comet Facts
A quick and easy way to make a replica of a comet. The replica is only for demonstration purposes; it won’t travel on a multi-century interstellar orbit, but it does give a good example of the popular “dirty snowball” description of the comet’s composition.
The segment is something I shot for Discovery’s HowStuffWorks – specifically the “Christmas” episode – as part of a description about how Haley’s comet was the first comet to have a predicted reappearance, back in 1758 (on Christmas day). This occurrence helped spread the new theory of orbiting celestial bodies, and allowed for greater interest in the concepts of our solar system. And now we teach these concepts at an elementary level.
The guts of a comet are believed to be a mixture of ice, dust, frozen gasses like ammonia, and organic compounds (although recent fly-by probes found that the exterior tends to be rocky, with the frozen components likely on the inside). These are ingredients that most of us have under the sink and in our garage, and using them, we can create a comet of our own.
Ingredients:
-A few handfuls of dirt
-Couple cups of water
-Few ounces of corn syrup
-Squirt or two of ammonia
-Large bowl
-Couple plastic bags
-Gloves (thick, waterproof)
-Dry ice (OK, this is the one part that might not be considered “household” — but it’s super easy to get). A few pounds will be more than adequate, and works best if smashed into as fine a powder as you can get. Do this inside one of the plastic bags, against a cement floor/sidewalk, using a hammer. Wrap it in a towel to keep the bag from tearing.
Steps:
(Wear the gloves to keep you from getting frostbite)
-Line the bowl with one of the plastic bags, opened so it can be lifted out and hold the contents
-Mix together a cup or two of water, 1/2 cup or so of dirt, the corn syrup and the ammonia
-Pour in the dry ice powder bit by bit while continuing to mix
-As it starts to slush and harden up, lift the bag out of the bowl and shape the mush inside of it into a ball until it hardens
-Pull the bag back to reveal the “dirty snowball” that you’ve formed. Sprinkle more dirt and water on the outside
The comet you’ve just formed is very similar to those flying through space. One of the fun parts about it is watching the vapor jets that escape from the fissures in the surface, especially when held close to a bright lightbulb. This is similar to the way the heat from the sun warms up a passing comet and causes its components to “steam” — which causes the signature comet tail (actually just the gas and dust trail being blown away from the sun by its cosmic winds, no matter what direction the comet is traveling).

A few more interesting facts: the orbit of Halley’s Comet has it reach just a bit past the outside of Neptune. This journey takes 75-76 years (the next appearance is 2062). Its speed ranges from 3600 km/hr at the furthest point from the sun, to 360,000 km/hr as it boomerangs around the sun at the closest point. This can be compared to the fastest spacecraft (or any other craft of human origin), the Helios I and II probes, which reached a maximum speed of 252,792 km/hr. Halley’s comet also orbits the sun in a path opposite of the planets (a “retrograde” orbit).
A Very Peculiar DIY “Hip-Neck Mount” Camera Extension

Check out this wacky “above the crowd” camera rig spotted at the royal wedding. What IS this thing?
My friend Travis is an awesome guy and a talented photographer. He’s the type of guy that I admire for finding life curious and fascinating. Case in point: an email he sent this weekend about the photos from the royal wedding, not of the newlyweds, but of the crowd that gathered to watch the event.
flickr had a post this morning with the official royal wedding photos. while i don’t care about the wedding, i was interested in seeing the photos and what they were like. looked few a through. flickr pointed out one large, overhead crowd shot. it was like a “where’s waldo” illustration. flickr also recommended to view the photo at the original size. it was pretty cool to drill into the photo and see people’s details. i noticed one guy with a crazy camera contraption so he could shoot over the crowd. i thought it was pretty genius. hence this email. thanks for playing.

Here’s a link to the full size image.
An impressive gathering, no doubt – but the “above the crowd” camera extension Travis spotted really piqued my curiosity. What exactly is that thing? And how can I make my own on the cheap?
Looking closely, it appears to be a long extension pole/monopod with an adjustable head (this one fits the bill, only costs $22). A leash/nylon strapping connects to the top of the pole; the bottom of the leash straps around this inventive photographer’s neck (it appears the neck segment has padding of some sort). Buckles adjust the length of the strap to control the angle/height of the pole.
I’d love to see the base of the extension pole. A flag-pole holster would work well to help keep things stable.
Maybe most importantly, triggering the camera. A wired remote for the shutter release? Or, perhaps easier, an IR remote (I recently got this $10 remote for my Nikon – and I love it), although I imagine there might be interference issues with a crowd that size.
A shame that this photographer is anonymous – I’d like to chat about his setup, and see the resulting photos he took. Regardless, I might try to build one of these things for kicks too.
Celebrate your DIY-Handiness With My New Circular Saw and Drill Press T-Shirts
My first two DOIT shirt designs have just been finalized (totally designed by yours truly) and are ready for ordering. Here they are: Circular Saw Tee and Drill Press Tee. Two of my favorite and most used tools, diagrammed for easy explanation. Finally show off what a badass builder/maker/tinkerer you are.
And check out the new store site just for my goodies: I call it RadWorkshop
Pre-order yours now and get free shipping! (International orders are discounted by $5).
Your choice of black, white or grey.
============================
============================
Using Your iPhone as an Audio Recorder Will Make Your Videos Better
A fast way and easy to make your videos better is to improve the audio quality. It’s a proven fact that poor audio will turn people away from a video much quicker than poor video.
Have you ever seen a video that sounds like it was filmed in a large, empty room? Or one that sounds like it was filmed in a wind tunnel? How about a video where the sound of the person holding the camera is louder than anything else on the clip? Most videos on YouTube fall into this category, and are examples of shoddy sound killing what might have been a good video otherwise.
While the professionals use an array of audio recording devices to guarantee flawless audio (and even then, I’ve worked on a high-end project or two that had its own share of audio issues), most people don’t have access to this type of equipment. But without a expensive recorder, or even a regular corded microphone (assuming your camera has a mic input – does it?), a decent standalone digital recorder, held close to the subject, will give great results, especially compared to the alternative of using just the internal mic on the camera.
Turns out that the iPhone has respectable recording capabilities. It’s highest-quality setting is 44.1khz – the same as audio CDs. And the iPhone 4 has a double-mic noise-cancellation system built into it that does a surprisingly good job keeping things sounding clean. Set up right and placed near the talker, you’ve effectively got a good, wireless audio recording solution.
Here’s what you need:
-Camera
-iPhone
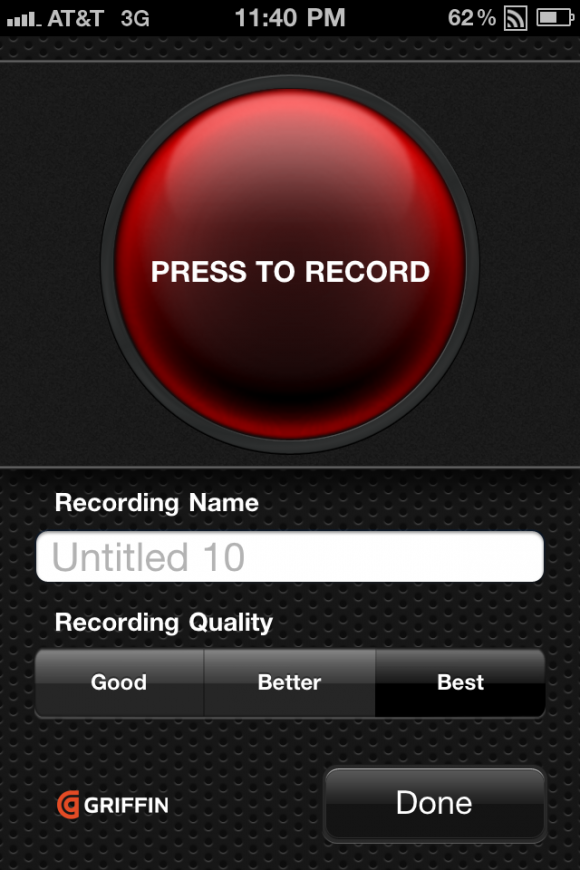
-Audio recording app (I use Griffin’s iTalk (free version), but other recorders like the one from Dava work just as well)
-Video editing software that lets you see wave forms and import audio (iMovie works perfectly well for this, and is what I used for the above video)
-iPhone headset (optional, personally not recommended)
-Shirt with breast pocket (better option than the headset)
Steps:
-Set the iPhone sound recorder to best quality
-Start recording on the camera (video) and iPhone (audio app)
-Put iPhone in shirt pocket, or very close by (assuming the subject won’t be mobile)
-Stand in front of camera and give a single, sharp clap (sync clap)
-Film! And talk!
-Stop recording on both devices
-Transfer audio to computer (most apps let you email it to yourself. Griffin’s app lets you email small files, or wirelessly sync larger ones)
-Import video and audio to editing software
-Display wave form
-Search for the audio spike from the sync clap on both waveforms (camera’s internal mic and iPhone’s mic)
-Using the spike, line up the wave forms as closely as possible
-Mute or delete the audio from the camera’s internal mic
-Edit as desired

That’s it – it’s a very simple process. And really, it works with any audio recorder that lets you export the audio, so if your Android phone has a sound recorder, go to town.
One note about using iMovie – it doesn’t let you lock the audio and video together, so be careful when doing fancy edits after importing the audio. It’s not impossible, but it does create potential for the sound to detach from the video, which can be a bit frustrating. So far, this hasn’t been a big issue for me.
Setting Up and Adjusting Your Bandsaw
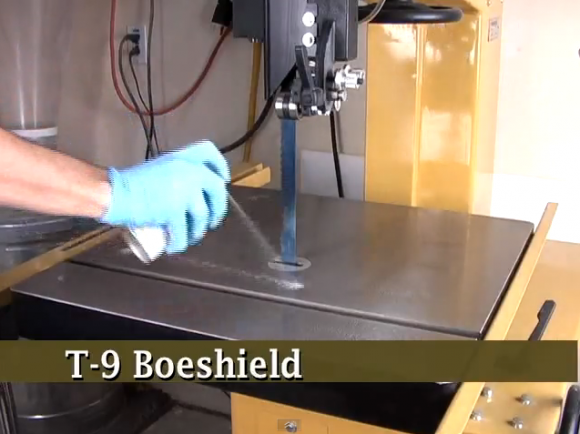
It’s actually been a long time since I’ve used a bandsaw regularly, so my recent acquisition (Craftsman 12″, 3/4HP) has me learning some new and useful tidbits about how to get a bandsaw adjusted for optimal performance.
One of the best pieces of information I’ve found so far for this is from a website called TheWoodWhisperer – an encyclopedia of wood working information. Marc, the guy behind the site, makes very informative and entertaining videos and posts that cover just about every topic you might want to know about wood and tools.
The Bandsaw Setup/Tuneup video is hosted on YouTube (as are most of his videos), and is almost 16 minutes of good information for the new bandsaw owner, or one who just needs a quick refresher on how to keep their machine fresh. It ranges from the initial work surface cleaning and prep, changing the blades, setting the guides, setting tension, adjusting the fence to compensate for drift, and more.
And speaking of blades, a new one will be my first purchase for this saw – I’ve got things set up according to the specs, but still getting a bit of a ragged cut, which is indicative of a shoddy blade, the type that usually come stock with a new saw. These ones from Timber Wolf are highly recommended (they’re also available on Amazon).
Harbor Freight 25% Off Coupon

Tomorrow, April 24, 2011, Harbor Freight offers up a one-day, one-use only coupon for 25 percent off any one item. I already know what I’m getting with it. How about you?
Use this coupon to save 25% off any item when you shop Online or at a Harbor Freight Tools store. *Cannot be used with any other discount or coupon. Coupon not valid on any of the following: gift cards, Inside Track Club membership, extended service plans, Compressors, Generators, Tool Cabinets, Welders, Floor Jacks, Campbell Hausfeld products, open box items. Coupon not valid on prior purchases after 30 days from original purchase date with original receipt. Coupon cannot be bought, sold, or transferred. Original coupon must be presented in-store to receive the offer.
Valid One Day Only. 4/24/11. Limit one coupon per customer.
How To Cut a Bolt Or Threaded Rod And Save the Threads
One of those simple ones that is always good to think about ahead of time.
Step 1: Put a nut or two onto the bolt/rod and tighten down past the point that will be cut off
Step 2: Cut bolt/rod with hacksaw, grinder, or bolt cutters
Step 3: File lightly to remove any flanging caused by cutting the metal
Step 4: Apply a few drops of oil (3-in-1, etc) and then slowly remove each nut, using a wrench if necessary.
Rock the nut back and forth if binding is encountered to allow the threads on the nut to re-cut the threads on the bolt.
Quick, simple and cheap.
What’s the Right Extension Cord Length for My Tools?

Most of us spend very little time thinking about what extension cord to use for a project (I’m guilty too). For christmas lights, it tends to be thin and green, easy concealed. When using the electric chainsaw, grab the orange one, highly visible for safety.
But there is actually a lot more to consider than which color to use. And violating this can potentially ruin your power tools and/or cause a fire.
So how do we know if the extension cord size we’re using is safe?
First, determine the distance you’ll be from the outlet. You’ll want to find the shortest cord you need for where you are working.
Next, find the amount of amps you will be using. All power tools have an amperage rating, it’s required to be printed on the tool. Medium sized drills are around 4-5A. My bandsaw is 7A. Shop vacs weigh in around 10A, and circular and compound miter saws are easily found in 15A sizes. In our power-hungry society, it’s easy to get high amperage tools.
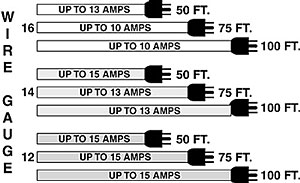
Along with the shortest length needed, you also want enough thickness (wire gauge) to safely carry the amps being used by your tool. Most hardware store-style extension cords run from 16 to 12 gauge As you can see on this chart, you’d best avoid using 16 gauge extension cords from 50′ up for anything over 13A (sorry, guy who wants to bevel thick beams 100′ away from his house). In fact, to go 100′ away and feel decent about using a high-power saw, you’ll want a 12 gauge or thicker extension cord.
The longer the cord, the more internal resistance it has. Increased resistance lowers the available voltage and amperage, which causes forces tool’s motor to work harder, and hotter. Too much and it burns out. Sadly, I’ve seen this exact situation ruin a very expensive Bosch rotary hammer. Even with thick, low gauge cords, there’s a limit to how far you can daisy chain before you end up toasting your gear.
Using a power tool with a thin/long extension cord also generates a lot of heat in the cord and plug itself. That heat can easily reach the point of melting the insulation, causing a short circuit and a fire.
Two links for more info:
http://www.housepainting-guru.com/extension-cords.html
http://www.electrical-contractor.net/Leviton_Hints3.htm#ImproperCord
And, for those who like to know how much voltage is lost due to the gauge and length of their wiring, this voltage drop calculator is very handy.
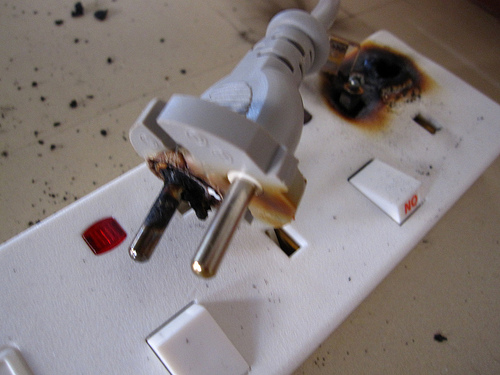
Lastly, a gallery of burnt out plugs and wires. Click any of the pics for the corresponding story/website/info.
Metric Drill Bits
I was working on a project this weekend and realized I don’t have metric drill bits. So I ordered some.
This is not a terribly interesting post, but one of those things that I share to help spur those of you to action that might want to avoid a similar hold up.
Here’s the set I bought. 25 bits, $35. Not bad at all.


