San Francisco Fire Department’s Ladder Shop-and Building Your Own Ladder
Inside the Ladder Shop at the San Francisco Fire Department – a wonderful look at a historic institution that has been building wooden ladders for the SFFD since the early 1900’s. Used instead of the modern lightweight metal versions due to the amount of powered trolley lines still in use in the city (and partially for the wind-resisting benefit the extra weight gives). They’re not cheap, and the process is not fast, especially the time required to age the wood before construction can occur. Watch the video to get all the details.
Want to build a wooden ladder yourself? First, I recommend considering a pre-built one; a ladder that has been built with an unseen flaw can be dangerous or even deadly. That warning given, here is a set of plans to make a basic wooden ladder in just a few hours.
Tools and Materials
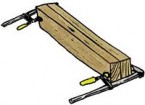
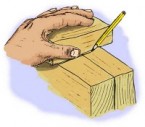
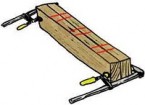
You will only need a few tools to build your quick and easy wood ladder. First, you will need a saw. I recommend a circular saw but even a simple hand saw would even suffice. Next, you will need either a hammer and nails or a screw driver (power drill/driver recommended) and screws. You will want two clamps to aid in cutting the ladder rails, a pencil, and a tape measure. Finally, you will need at least three 2″x4″x8′ boards (if your ladder is going to be taller than 7′, get longer boards).
My Halloween Pizza Bash Video
Halloween is a big deal on my street. This year I invited a few friends and neighbors over to pass out candy while I made pizzas. It was a blast. Many, many thanks to PizzaHacker for creating the PizzaForge oven and for working with me to build a prototype of a one-piece unit. Anyone that follows him and has experienced the pizza his creation produces knows that he’s designed something truly awesome.
Also, thanks to Chris McMains for delivering a fresh batch of starter to use for the dough. I used the Varasanos recipe (with a pinch of dry yeast) and everyone, including myself, was raving about the flavor.
Here are the technical details on the video:
Camera: Nikon D80
Lens: Nikon 10.5mm f/2.8
Tripod: Manfrotto
Image capturing software: Sortofbild
Runtime: 4 hours 15 minutes (stopped when the battery died)
Assembled with Quicktime Pro, edited on iMovie
Color correction in Photoshop (removed some of the overpowering orange coloring and lightened shadows)
Music: “Ghosts N’ Stuff” (Hard Intro Remix) by Deadmau5
This might be the best thing I’ve ever made. It also might be the weirdest thing I’ve made. Watch in HD on Youtube.
Only got one photo of a pizza cooked that night, but it was a good one. Everything was really clicking.
DIY Folding Plywood Rack for Tacoma Pickups

Small pickups have advantages over their larger brothers, and in the case of Mike in Missouri, he decided to trade the cargo space of his big truck for the efficiency of a Toyota Tacoma. Unfortunately, the Tacoma’s wheel wells cramp the bed space and don’t allow for full sheets of plywood to fit inside.
A mechanical engineer by trade, he quickly sorted out a solution: a foldable plywood rack that slots in and out of the existing space as needed. With a minute’s notice, he can assemble the rig to carry 4×8 stock, complete with hooks for tiedowns and space below for other items.
Check out his entry and writeup on the project on lumberjocks.com – no specifics about the plans are listed, but some tips are available in the comments section.
Put a rear wall (hinged door with lock) on the bottom of this and you’ve got a DIY tonneau cover.
iPhone 4 vs Ducati Superbike at 100 mph
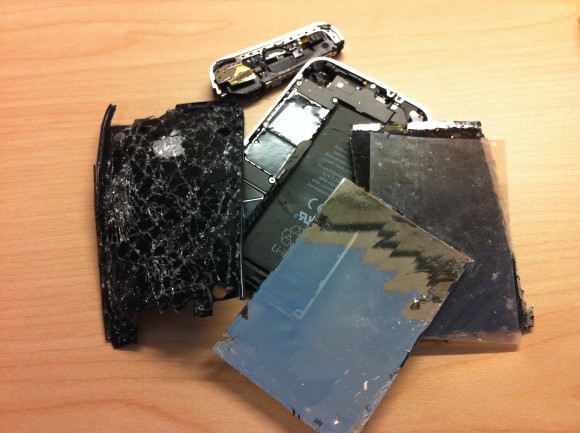
My friend Michael rides motorcycles, and races them on the weekends. He’s a Ducati guy. He’s also a big techie, one of the earliest adapters I know (he had an Archos player WAY before anyone else – and used it regularly). Still, I was pretty surprised by the photo he showed me of his iPhone after a recent mishap at the track. The chat transcript has the details.
Racetrack? Which one?
Infineon Raceway at Sears Point, Sonoma, CA.
How fast were you going at that point?
~100mph at the beginning of the straight were it was picked up.
Your pocket wasn’t closed?
It was stuffed in my racing boot.
When did you realize it fell?
When one of the track Marshall approached me with it asking if I owned an iPhone 4.
Were you able to retrieve any data/pics?
All was recovered thru iTunes “Restore backup.” Hence it is very important to do a complete sync once awhile in an event that this may occur.


=====================
Although I suspect a case wouldn’t have mattered much at 100 mph, a recent and pretty intense accident that I dealt with was nicely handled by my bumper-and-bestskinsever-wearing iPhone. I replaced the skin after the accident; the phone was flawless underneath.

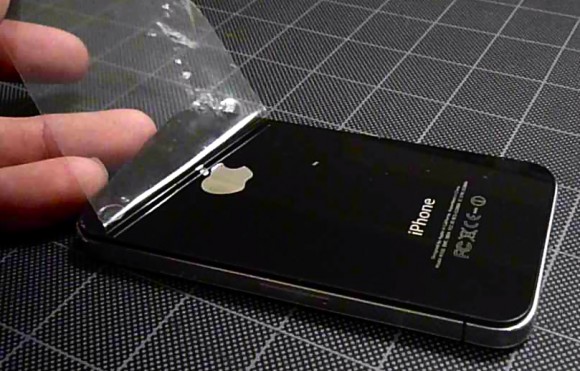
What could protect a phone dropped onto the pavement at 100mph? One funny thought is something similar to a build I did on Rock and Roll Acid Test: each of the hosts had to build a guitar case that would be able to protect the axe from a series of catastrophic accidents. Mine used partially deflated kickballs as air-ride suspension, a frame that flexed and bent at specific points similar to a car’s crumple-zones, and automotive airbags mounted on the exterior with a triggering system that set them off when a strong jolt occurred. Maybe a bit much for an iPhone, but guitar-wise, it functioned flawlessly. I suppose it depends on how important your phone is…
You can catch part of that segment on my RRAT highlight clips.
Calculating Trajectory – A Few Notes In Case You Ever Find Yourself Near a Giant Slingshot
Not every episode of Catch It Keep It involves saving falling objects – but as the title of the show indicates, it does happen from time to time. And when an object is launched through the air, it helps to know how to track the trajectory of it.
There are a number of calculators available online, ranging from simple three-field layouts to impressively complicated, with every ballistic variable definable. But when you need to, sometimes you just have to get down and dirty and crunch some numbers. For CIKI, I built my own spreadsheet based off various trajectory formulas that allowed me to get the specs and graphs I needed – handy when launching an object off the roof of our workshop, for instance.
Ehow has a pretty simple breakdown of calculating trajectory. It requires some easy trigonometry (get your money’s worth from your calculator and use the Sin/Cos/Rad functions). This will give you a good start.
1. Break the initial velocity into its vertical and horizontal components. You will already need to know the angle at which the object was fired and its initial velocity. For this example, an archer fires an arrow at 30 degrees with a velocity of 150 ft/sec.
V0x = 150*cos(30) = 130 ft/sec
V0y = 150*sin(30) = 75 ft/sec
2. Choose a value for time and calculate the horizontal distance at that time. It’s best to start with zero and work your way through the trajectory incrementally. For this example, the value is calculated at
t = 1.
x = V0x*t = 130*1 = 130 ft
3. Calculate the value for vertical distance at the same time interval. The value for gravitational acceleration in English units is 32.2 ft/sec^2.
y = V0y*t – 0.5*g*t^2 = 75(1) – 0.5*32.2*1^2 = 58.9 ft
4. Plot the horizontal and vertical values on a sheet of graph paper. Choose another time value and calculate another set of coordinates. Continue until you have enough points to define your trajectory.
Joe, the engineer challenged to find the landing spot of the Big Green Egg for his team, was awesome. He pulled out all the notes you could use to check and re-check, given the data and measurements they pulled from the demonstration. I really enjoyed spending a few days with him.

The hard part is adding in other elements (launch height, air resistance, rotation); things get a bit trickier. With so many variables, the safest bet was always to eliminate as many as possible by trying to take trajectory calculations out of the equation altogether… Giant butterfly nets are always a good thing to have near a giant slingshots.
Una Pizza Napoletana Opening in San Francisco, Street Food, and Building Your Own Mobile Pizza Cooker
A few weeks ago I traveled to my old home of San Francisco to experience the opening days of an eagerly awaited new pizzeria: Una Pizza Napoletana. The opening was actually the rebirth of what had become a legendary pizzeria in NYC (which had previously existed in NJ), opened in Manhattan in 2004 by Anthony Mangieri (read the writeup from Slice’s first visit to his location, six years ago to the day). Quickly becoming a city-wide phenomenon and then a national point of pizza conversation, Mangieri cemented his place amongst the greats with a strict commitment to excellence and no-nonsense pizzeria approach.
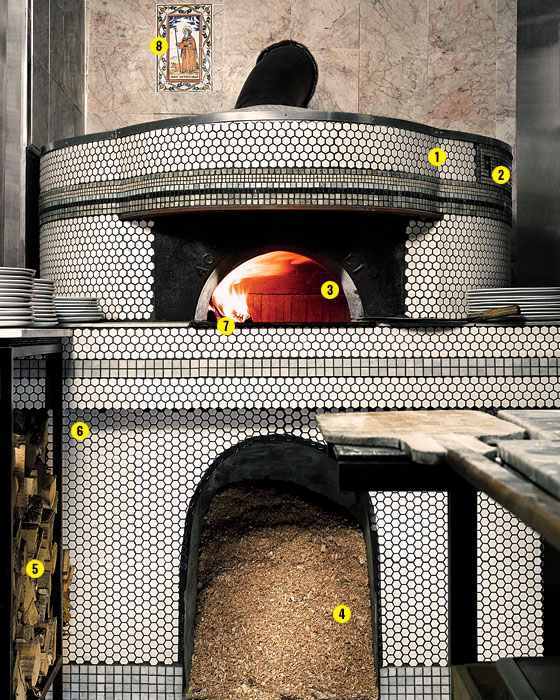
And then, one day in mid-2009, he shut it all down; as Mangieri explained, he always wanted to live in San Francisco, and decided to do just that. The store was sold and reopened as Motorino (still scoring high marks on my NY pizza visits), and the pizza world began to loudly chatter about exactly when and where Anthony would resurface.
Trebuchet Roundup: Eight Online Plans Reviewed For Building Your Own

It’s autumn again. Such a wonderful time of year. Cider, hay rides, freshly bought school supplies. And launching things far through the air with catapults and trebuchets.
This year, instead of being a mere catapult observer, why not build your own? Building a basic trebuchet is really not that complex – it consists of a frame, a throwing arm, a counterweight, and a sling. The trickiest parts tend to be determining the sling release point, the bearings to get things rotating smoothly and deciding how big you want it to be. I’ve poured through various plans on the internet and have compiled a list of sites with notes to anyone that’s looking to make one for themselves.
Some of these are complete projects, while others are good for getting ideas on how to build your machine. Put it all together, add in some personal touches, and watch stuff go flying. Get busy!
==================
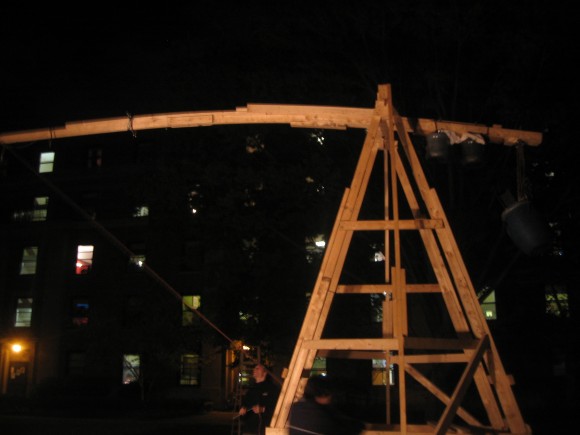
MIT college project that became much bigger than originally intended. Built almost entirely from 2×4’s, combined together for added strength and support as needed. Counterweights are inefficiently attached directly to the throwing arm, rather than using a separate container that articulates downward from the arm. Was able to throw an object of undisclosed weight/size (water balloons) 204′ with their best published throw, a distance that should be able to be improved greatly with small changes, owing to the large size of the machine. No blueprints or specific materials (aside from 2×4’s, which was their only material), but a decent selection of build photos. Good site to help get ideas for large builds. Project cost: about $200. (link)
How To Re-Key a Lock. How to Pick a Lock. How to Break a Kryptonite Lock
I have a bin full of keyless locks – probably a couple hundred dollars’ worth of them. One in particular, a bicycle cable lock made by Master Lock, would be perfect to help keep any potential barbeque thieves from stealing my new Weber from the side porch. Remembering how a locksmith once used just a blank key and a file to make a key for my old Land Rover’s car door, I decided to research how to create a new key for this lock. Found this video – it doesn’t look too hard… that is, if I can get the cylinder out.
Dive into the howstuffworks entry on the pin and tumbler setup, and a good overview on how lockpicking works.
The process of re-keying a lock is very simple. The locksmith removes all of the pins from the cylinder. Then, drawing from a collection of replacement pins of various sizes, the locksmith selects new lower pins that fit perfectly between the notches of the key and the shear line. This way, when you insert the new key, the lower pins will push all the upper pins just above the shear line, allowing the cylinder to turn freely. (This process may vary depending on the particular design of the lock.)
Lock-picking skills are not particularly common among burglars, mainly because there are so many other, simpler ways of breaking into a house (throwing a brick through a back window, for example). For the most part, only intruders who need to cover their tracks, such as spies and detectives, will bother to pick a lock.
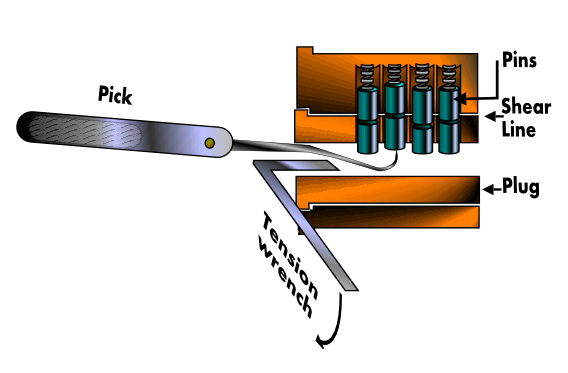
So let’s assume that you’re not a burglar and you are interested in picking a lock solely for recreational purposes. A good site with plenty of basic info is the wikihow page on lockpicking. The general centerpiece is the tension wrench, an L-shaped clip that lets you put some rotational force onto the cylinder. As the pins are lined up with the picks, the tension generated by the tension wrench holds them in place, until all the pieces are lined up and the lock rotates open.
Lock picking is really all about the tension wrench. You will constantly need to find and hold just the right amount of torque to allow you to push the upper pins out of the cylinder while ensuring that pins set and stay set.
Looks easy, but from experience I an vouch that it is indeed tricky at first.
Finesse is good if you want to preserve the lock or need to remove the cylinder for rekeying. If you just need to get your bike free because you lost the key to your kryptonite down the sewer, there are a few ways to go about it. Just make sure to bring some proof of ownership so you don’t get hassled by someone thinking you’re stealing bikes. Don’t steal bikes!!!
Angle grinder:
Hydraulic car jack (this is a floor jack, although people use bottle jacks too):
Freeze it with compressed air, or use liquid nitrogen. The times I’ve experimented with using a bottle of compressed air (flip it over to spray the super-cold propellant out the nozzle), I didn’t have much luck – I don’t know for sure that it gets cold enough to truly affect a kryptonite lock. These guys show that it’s possible to do so with a small combination lock though.
What does work, however, is liquid nitrogen. Submerge the lock as best you can into the liquid until the boiling mostly stops (meaning the temperature of the lock has gotten close to that of the liquid). The metal will now be brittle enough to crack apart with a few good hits from a hammer.
Another Homemade Near-Space Balloon Project – This Time With Video
There’s a short but growing list of awesome people who have successfully launched DIY aerial photo and video rigs. Add to that list father/son duo Luke and Max Geissbuhler and their personal homemade spacecraft. This is my favorite of the many I’ve seen so far due to the ingeniously effective system to keep the corkscrew-like spinning to a minimum, as well as the choice to use a HD video camera instead of time-lapse photography. The two pieces actually work well together – many of these projects have spun too violently for any video output to be enjoyable.
The Luke and Max project used the following materials:
– Weather balloon designed to pop when it reaches 19′ in diameter (the balloon grows in size as it elevates into thinner parts of the atmosphere)
– GoPro HD camera (the best lightweight, rugged, waterproof camera – Mythbusters uses them a lot, and they only cost $250. They’re seriously awesome)
– iPhone with GPS and Instatracker enabled for measurement and recovery
– A couple handwarmers to keep things running in the cold, windy extremes 90,000′ over the surface of the planet
Launched from upstate NY and collected 30 miles away, it completed the journey to space and back in just over an hour and a half. Wonderfully, much of the process leading to launch and immediately afterward was documented and is available to watch and inspire you. Enjoy.

Afterdark – Short Film Starring Me, and Some Notes On Making Your Own Short Film
A couple years ago I acted in a short film, one of the few things I’ve done as an “actor” (a term I use reluctantly), rather than as a host or behind-the-scenes. Directed and edited by the talented Camilo Restrepo, Afterdark is a post-apocalyptic thriller that blends the lines between right and wrong while playing with time and space.


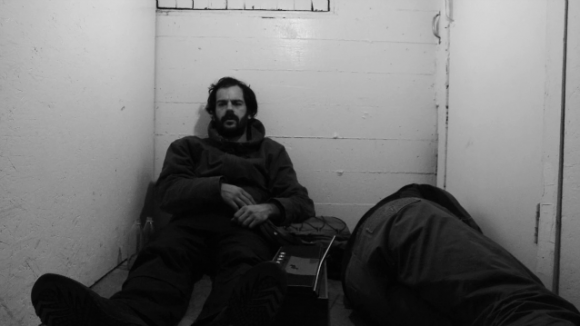
The piece was shot late at night over a couple weekends in early November 2008. Primarily filmed in the basement of a building in San Francisco’s Tenderloin district, with one shot taking place in a studio near North Beach. Camilo and his staff had good vision and execution on this film, especially coaxing a decent performance out of me and co-star Clouchard Barbone.
Some technical notes, for those of you like me who love gadgety stuff:
Camera: Sony Z1-U
Audio: Zoom H4 and built-in
Microphone: Sennheiser MKH 416
Tripod: Manfrotto 055XProB; Homemade platform tripod; Dolly cart
Lighting: Bare light bulb; Ikea dimmer; Two worklights; High-power Arri lighting kit (final scene)
Interested in making a short film? eHow has a decent series of videos explaining the general steps and process, to help you organize the pieces needed and get started putting something together. One tip they may have overlooked: always feed the crew and actors. It’s a lot easier to get people to cooperate when they’re not thinking about how hungry they are.
