EZ Heat Reusable Hand Warmer: Supersaturated Solution Transforms to Solid, Gives Off Heat
 The science nerd in me loves my EZ Heat handwarmers.
They’re filled with a supersaturated liquid that gives off heat when provoked/activated to crystallize. Temperature reaches about 130º F, and from my experience the heat lasts for longer than 30 minutes. Boil in water to reset.
Supersaturated solutions were my favorite part of chemistry: A liquid that has more material dissolved into it than it can normally contain, usually with the assistance of heat. Certain circumstances allow this solution to remain liquid indefinitely, until some event creates a crystallizing chain reaction, which turns it to solid. This transformation is exothermic, meaning heat is generated as well.
In the case of the hand warmers, a thin metal tab is inside the plastic packet with the solution. Clicking the tab creates enough of a disruption to begin the reaction. The liquid turns solid in a very awesome looking way. I’m not sure if I like these best for the heat they give off, or to continually watch them activate.
I bought six of these. Here’s the video review I made for Sneakmove.
Here’s how to make a supersaturated solution, from Wikihow. Read More
How to Make A Digital Pinhole Camera – Fast, Cheap and Easy
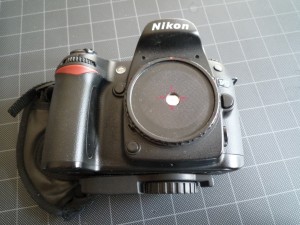 The most basic style of camera is the pinhole camera, usually a light-proof box that holds a piece of film inside. When the pinhole is uncovered, the film is exposed for an arbitrary amount of time, and later developed to discover the results. The images often have a soft, almost ghostly look that is very distinct and artsy.
With the advent of digital SLR cameras in the past few years, you can now make an easy version of this same simple camera that uses a digital sensor instead of film, and simple materials you already have at hand. Here’s how to make your own.

Materials
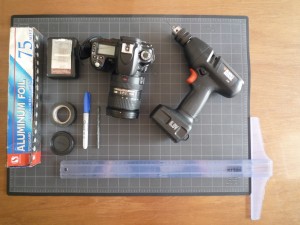 • Digital SLR camera
• Spare body cap (get one cheap on Amazon or Ebay)
• Drill
• Two drill bits, one small and one medium (1/16″ and 1/4″ should work fine)
• Aluminum foil
• Ruler/Triangle
• Marker
• Black electrical tape
• Gummy eraser or other similar material
• The thinnest needle you can find
Step One: Mark the center of the body cap. There are a couple easy ways to find the center of a circle, using a right triangle or a compass. I opted for the triangle method as I have a t-square handy.
Deal of the Day: Bosch Laser Rangefinder/Measuring Tool $65 (Update: Still a Steal at $89)
78% off the list price ($291), December 12 only.
The special is over, but the price has only gone up to $89.
I have this exact model and love it. I use it at home to measure simple things like the square footage of my room (it calculates area and volume automatically), and it’s been extremely handy while filming my TV show, for extreme needs like “how high the TV set dangling from the crane?” “How far is the coconut cannon shooting?” and “Will the scooter we’re launching from the roof hit those power lines?”
It’s rugged. I’ve dropped it a lot, but the casing is built to withstand shock. It’s also designed to stand by itself, something I liked more about this model than others.
And it’s small. 4″ tall. Slips right in your pocket.
Of course, like any laser rangefinder, it’s difficult to get a good read on long distances in bright daylight. Aside from that, it’s just about perfect. I keep mine sitting on my shelf, always close at hand.
I can’t believe it’s only $65. Grab this while you can.
Make Your Own Wooden Pizza Peel (Paddle)
A pizza peel (that’s the proper name) is a must-have tool for any pizza chef.
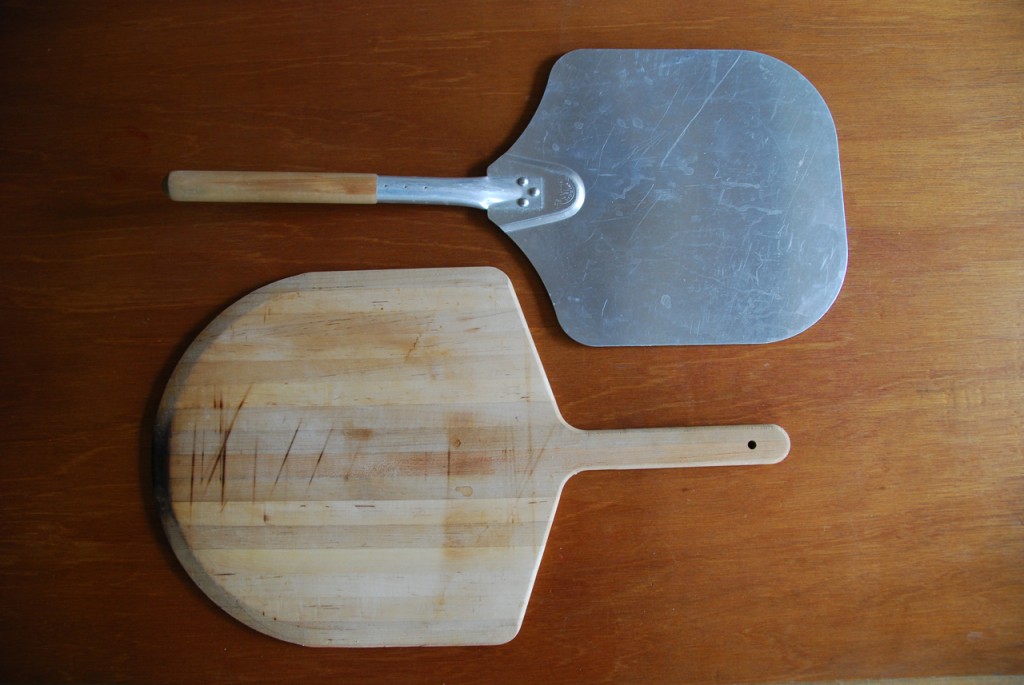
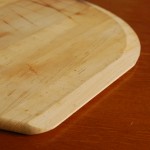 Most of the wooden peels you’ll find in the restaurants and stores have a wide paddle area with a simple tapered edge, extending about 3/4″ around the perimeter, top and bottom. The paddle itself consists of strips of soft wood, glued together, with an unstained finish. Sizes can vary from a few inches in diameter to rectangular beasts that are nearly 2’x3′, without the handle.
Constructing your own peel can range from relatively simple to beautifully hand crafted.
The fastest and easiest way to make a peel is with a piece of plywood.
• Find a scrap piece of quality plywood. 3/8″ or 1/2″ thick works well.
• Cut the plywood to the dimensions you require (my home-use peel is about 14″ x 14″, and overall length is 24″ – it’s shown in the top photo). Read More
Lime Mortar Repointing: How and When to Address the Mortar in Older Brick and Stone Walls and Foundations
Older houses come with plenty of charm, but they also have special requirements: Using the newer types of mortar on your walls and foundations can lead to problems; take care to keep your brickwork protected and to use the proper limestone mortar.
Three DIY Books for your Holiday Wishlist: Making It, Fashion Geek, and Learning Processing: A Beginner’s Guide to Programming Images, Animation, and Interaction
Three great books for anyone who likes to make stuff. Put these on your holiday wish lists.
 Making It: Manufacturing Techniques for Product Design
Lefteri’s latest book (his material book lineup includes Plastic, Metals, Ceramics, Wood, and more). An easily laid out format shows how various manufacturing techniques are used to make the everyday items we have around us. Full of inspiration.

Fashion Geek: Clothes Accessories Tech
How many other fashion books include instructions on how to hack their pedometers or solder LED throwies?
I’m going to name drop again because I’m still star-struck that I got to be friends with the author of this book, Diana Eng (read about my Wired magazine interview with her). She sent me a copy of her book not too long ago, and it really is a fantastic melding of fashion and technology. But even better than the cool styles Diana comes up with is her instructions on how to create these designs (both the sewing and the soldering) yourself.
 Learning Processing: A Beginner’s Guide to Programming Images, Animation, and Interaction
By far the most dense of these three books, but still completely digestible and useful for anyone that’s just starting out into the world of digital media. Read more about the open source Processing programming language here.
“This book teaches you the basic building blocks of programming needed to create cutting-edge graphics applications including interactive art, live video processing, and data visualization.
A unique lab-style manual, the book gives graphic and web designers, artists, and illustrators of all stripes a jumpstart on working with the Processing programming environment by providing instruction on the basic principles of the language, followed by careful explanations of select advanced techniques.”
DIY Hovercraft Plans – Leafblowers, Lawnmowers, 4 Stroke Engines
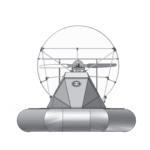 No one can argue that the hovercraft isn’t the coolest vehicle ever. And no one will argue that building one is a great idea. Turns out that they’re not too complicated to assemble, and depending on the size you want you may have the materials in your garage right now.
All hovercraft use the same concept: A blower attached to a skirted platform creates lift. The amount of lift depends on the size of the blower, the strength of the platform, and the depth of the skirting. The air that pushes out underneath the skirting creates a nearly frictionless surface for the vehicle to move on.
Want one? Make it!
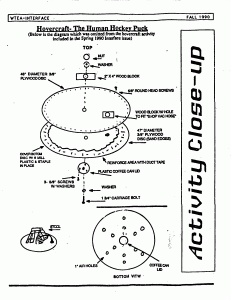 Simple version: The leafblower hovercraft.
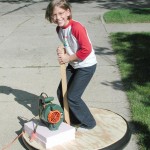 Platform: small piece of plywood
Skirt: 6mil plastic
Blower: a leaf blower from the toolshed
Details: The plastic skirting is affixed to the edge of the platform and continues entirely underneath it ( use duct tape and staples to get a good connection – and leave a bit of slack).
-A grommet (plastic coffee can lid) is placed in the center of the plastic on the bottom and screwed through it to the platform, to create a donut effect when the bag inflates.
-A small series of holes are cut in the skirt just past the grommet to let the air escape. -Air from the leaf blower inflates the skirt, and pushes out the holes underneath, creating a film of air that is nearly frictionless.
A single leaf blower can levitate a grown human this way.
Locomotion and steering: Your friend pushes you from behind. And laughs as you uncontrollably slide down a steep driveway.
Here’s a version on Instructables, one from Make magazine (PDF), and one person’s hovercraft projects.
Plus, a video:
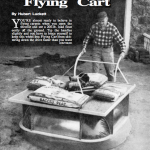 More advanced version: Vintage chainsaw engine hovercart. Read More
Bike Repairs Made Easy With the DIY Bike Repair Stand
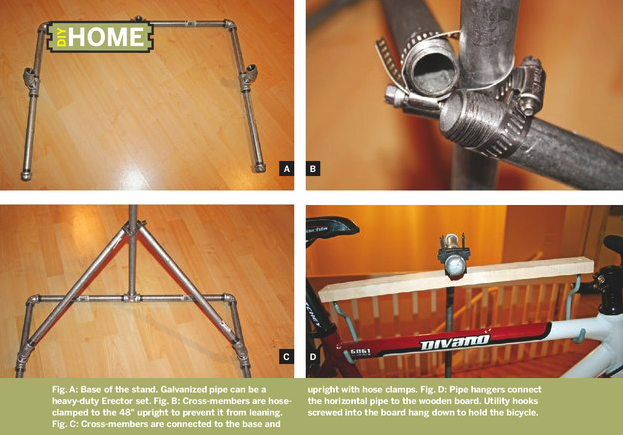
All bike repairs, from fixing a simple flat to complex derailleur adjustments, are exponentially easier with a proper bike stand. Good stands can cost $150 – $200 (like this one), but why spend all that money when you can build your own stand with simple materials easily found in your basement or garage?
Watch the video for info, and check out the writeup in Make magazine’s digital edition. Article starts on the right side of the page and continues to the next by clicking the arrow button on the top of the screen.
Biking from Tempe to Tucson-Route and Photos
Eight years ago I spent Thanksgiving by biking across the Arizona desert, exploring the path from Tempe to Tucson. The ride was magically warm and beautiful, and the people I met showed hospitality that I will never forget, including the woman at the Circle K in Florence, AZ that laid out a buffet of leftovers for two sweaty, hungry bicyclists, and the two nice gals in Tucson that let us sleep on their sofas. They truly embodied the spirit of the holiday.
This year I find myself celebrating Thanksgiving in Tucson once again, and decided to re-post my original writeup and photos in commemoration of the anniversary. Two clean-shaven, baby-faced bikers blazing trails across Arizona. Enjoy!
 |
 |
 |
 |
 |
 |
 |
 |
 |
 |
 |
 |
 |
 |
 |
 |
 |
 |
 |
 |
|
Read More
How Those Crazy Punkin Chunkin Machines Work – Cannons, Trebuchets, Centrifugals and Onagers – Behind the Chunk!
Part of hosting the Science Channel coverage of the 2009 Punkin Chunkin World Championships with Zach Selwyn means I get to do a few web videos to explain the ins-and-outs of how the amazing machines at the event work. These web spots are called “Behind the Chunk.” Here’s what I filmed, with some further information.
Also, if you’re looking to build your own trebuchet, check out my roundup of online trebuchet plans and blueprints.
Air Cannons: Consist of three components: Chamber, valve and barrel.
With the valve closed, the chamber (a large tank) is pressurized with a compressor that is a lot bigger than the pancake compressor you get in a kit from Home Depot. On the other side of the valve, a pumpkin is placed at the bottom of the barrel, which can reach up to 100′ in length. A good pumpkin will have a spherical shape that sits perfectly inside the barrel to allow the least amount of air to flow past it. The valve is opened as quickly as possible (the winning machines’ valves are hydraulically actuated), and the pressurized air rushes out of the chamber and down the barrel. The speed and force of this air is sufficient to shove the pumpkin at an incredible rate of speed. On the furthest throws, the pumpkins approach supersonic speeds as they exit the barrel – very impressive.
Example: Chunkonology
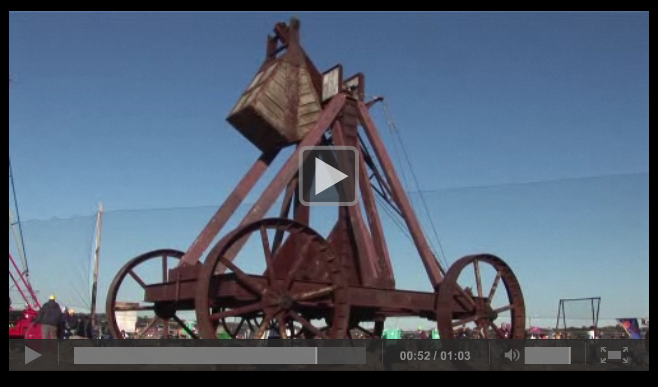
Trebuchets: Consist of a counterweight, a throwing arm, and a sling
The simplest trebuchets work with the throwing arm mounted as a simple lever, with a huge weight on one end and the sling connected to the other. The weight is lifted overhead while the sling is loaded with ammunition. When the sling is dropped (usually through the use of a quick release mechanism), it lifts the opposite, longer end of the throwing arm upwards with considerable velocity. The sling that is connected to the throwing arm is whipped around with even greater speed, releasing the payload when moving beyond the threshold of an angled pin that keeps it in place.
A more advanced trebuchet design is called the floating arm trebuchet, where the counterweight is separate from the throwing arm, allowing it to drop in an entirely vertical axis to maximize the effects of gravity. Amazon sells a small floating arm trebuchet kit that can throw a golfball 200′. Merlin is a highly engineered floating arm trebuchet.
Centrifugals: Consist of a car or truck engine, gearbox, series of propshafts and axles, and armature
Instead of spinning wheels on the ground, the centrifugal machines use the same machination to spin a windmill-esque setup hoisted 30′ above the ground. A pumpkin is cradled carefully at one end of the armature, which is accelerated through the gears to maximum speed. Some teams add to that top speed by then pumping other accelerants into the engine just before hitting the trigger, which releases the pumpkin at a preset point in the spin. This point of release is ingeniously controlled by a repurposed auto distributor setup. At the speed when the pumpkin is released, it’s hard to not be afraid for your safety and everyone else’s in the immediate vicinity. They spin like a helicopter on its side. Inertia II is a new centrifugal machine at Punkin Chunkin in 2009.
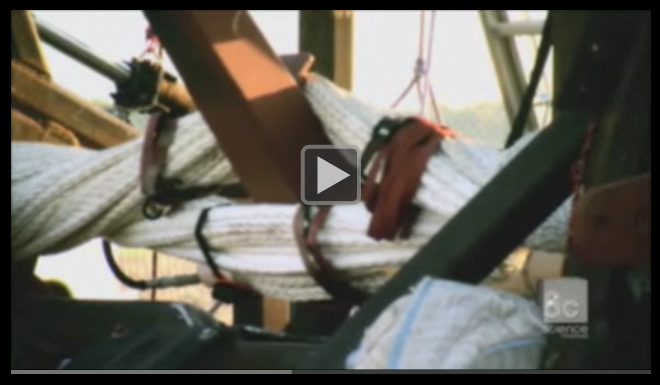
Onagers (torsion catapults): Consist of a rope bundle, throwing arm, and sling
The twisted rope bundle is maybe the perfect form of energy to power a catapult. As the rope is twisted, it stores a rotational energy in what becomes a torsion spring. This rotational energy transfers directly to the throwing arm that is tucked inside it. The arm is cocked into the loaded position, the sling is put in place, and the ammo is loaded inside. A quick release is triggered, the rope bundle snaps the arm forward and the sling whips overhead, launching its cargo with incredible speed.

