Awesome Homemade Pizza – Broiler Cooked in Cast Iron Pizza Pan

In my search for pizza perfection, I recently got a Mario Batali cast iron pizza pan. Last night, for a trial run (but not following the regular directions), I placed it in my broiler, pre-heated it on high for 20 minutes, then prepped a pizza using Trader Joe’s pizza dough (left out for a couple hours to warm up). Normally their dough is too sweet for my liking, so I gave it a fair salt and peppering before adding sauce and toppings (still no cheese in my diet, and still loving it). Milled some Cento tomatoes (They’re the most consistently good canned tomatoes I’ve found — I even have a “subscription” for them from Amazon, get a case every two months), and added a few kalamata olives, basil, and a small section of tofurky sausage. Read More
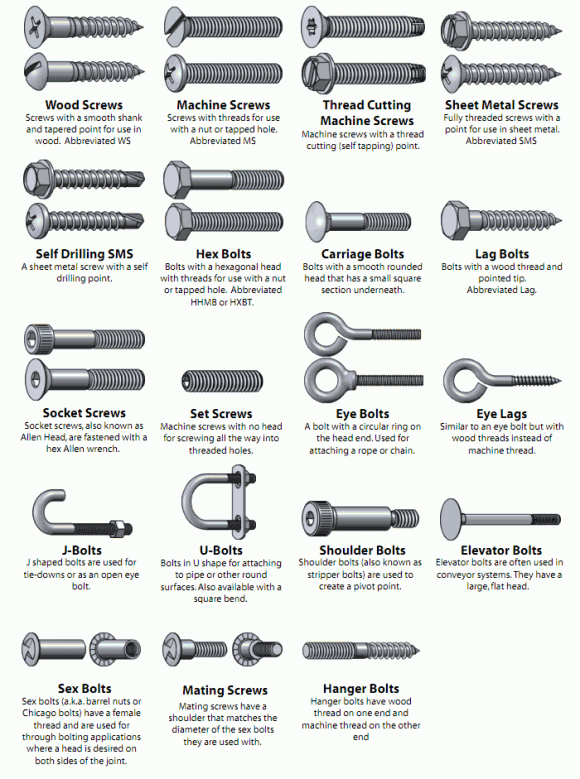
Visual Glossary Of Screws, Nuts and Washers
(Makers and DIY’ers: Make sure to add me on twitter and subscribe to my feed.)
BoltDepot has a great selection of charts used to identify and explain the wide variety of screws, bolts, nuts, washers and other pieces used for building just about every project you can imagine. Wood screws, machine screws, carriage bolts, lag bolts, square heads, torx, ogee washers and more.
There’s even a section about the grade/strength types of the different materials used for the fasteners. Very handy indeed.
Types of Screws
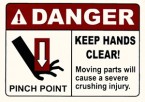
Violently Graphic Danger Signs for Workshop Safety
When it comes to safety, sometimes you gotta spell it out loud and clear. “This machine will sever your hand at the wrist. This machine will crush your fingers like a garbage disposal.” You get the idea.

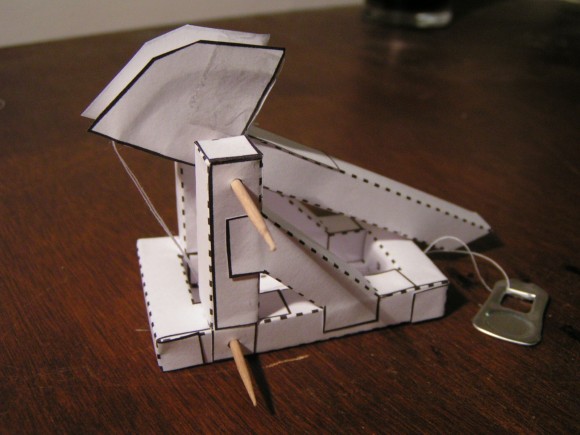
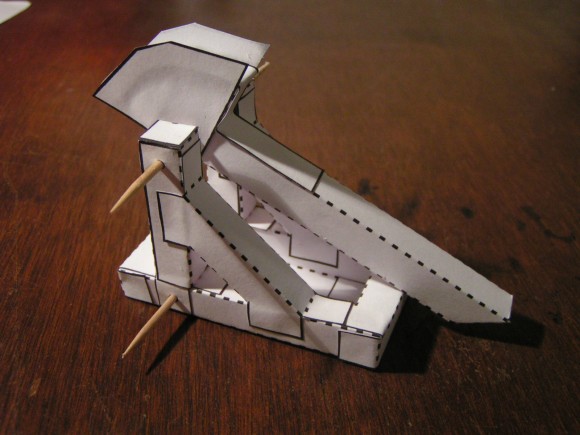
Palm-Sized Print and Cut Paper Trebuchet
Paper Trebuchet — a fun project for you projectile fans. Kill some time at work by printing the template, cutting it out, and folding it up. Then lay siege to your coworker’s sharpie collection.
This isn’t a traditional trebuchet in that it doesn’t use gravity to actuate the throwing arm, but it nonetheless mimics and demonstrates the motion involved. And it launches little projectiles pretty far! Great for a kid’s project, or homework assignment for you science or history teachers. I used it in a class I taught last summer and the kids loved building it.
Full instructions for assembly and operation are available here: The Paper Trebuchet on Instructables. By Kiteman
From the site: “You will also need two cocktail sticks, gluestick, a paperclip, stickytape, pliers, sewing thread and small weights such as nuts or modelling clay.”
Click the template to download the PDF.
Deal of the Day: HDE 750ºF Infrared Thermometer Gun For $16
HDE Infrared Thermometer on Amazon: $16 (free shipping if your order comes is over $25). Regular Price, $71 — that’s a $55 discount.
Infrared thermometers are great. Like laser rangefinders, they have a very useful function, but also are addictively fun in that childishly awesome way. Point it at something, pull the trigger and — “beep” — you immediately know how hot or cold it is.
I already have two of these and might pick up a third based on this undeniably low price. $16, no shipping charges. Goes up to 750 degrees Fahrenheit, and has a handy laser pointer to help direct the beam. I don’t know what the spot ratio is for it, but at this price, even the lower end would be OK.
These are great for pizza ovens. Fire it up, get the walls and floor up to temperature, and cook away. Similarly, put your pizza stone in your broiler and you should be able to get some great results too. Unless you have a high-end wood fired oven that rages hot, you should be covered by this thing. Otherwise, look for one that goes over 1000 (this one goes to 3000ºF, but you can find some deals on stuff the high-900F range. I got one like that at Harbor Freight).
Merlin-Style DIY Camera Stabilizer/Steadicam Build Tutorial
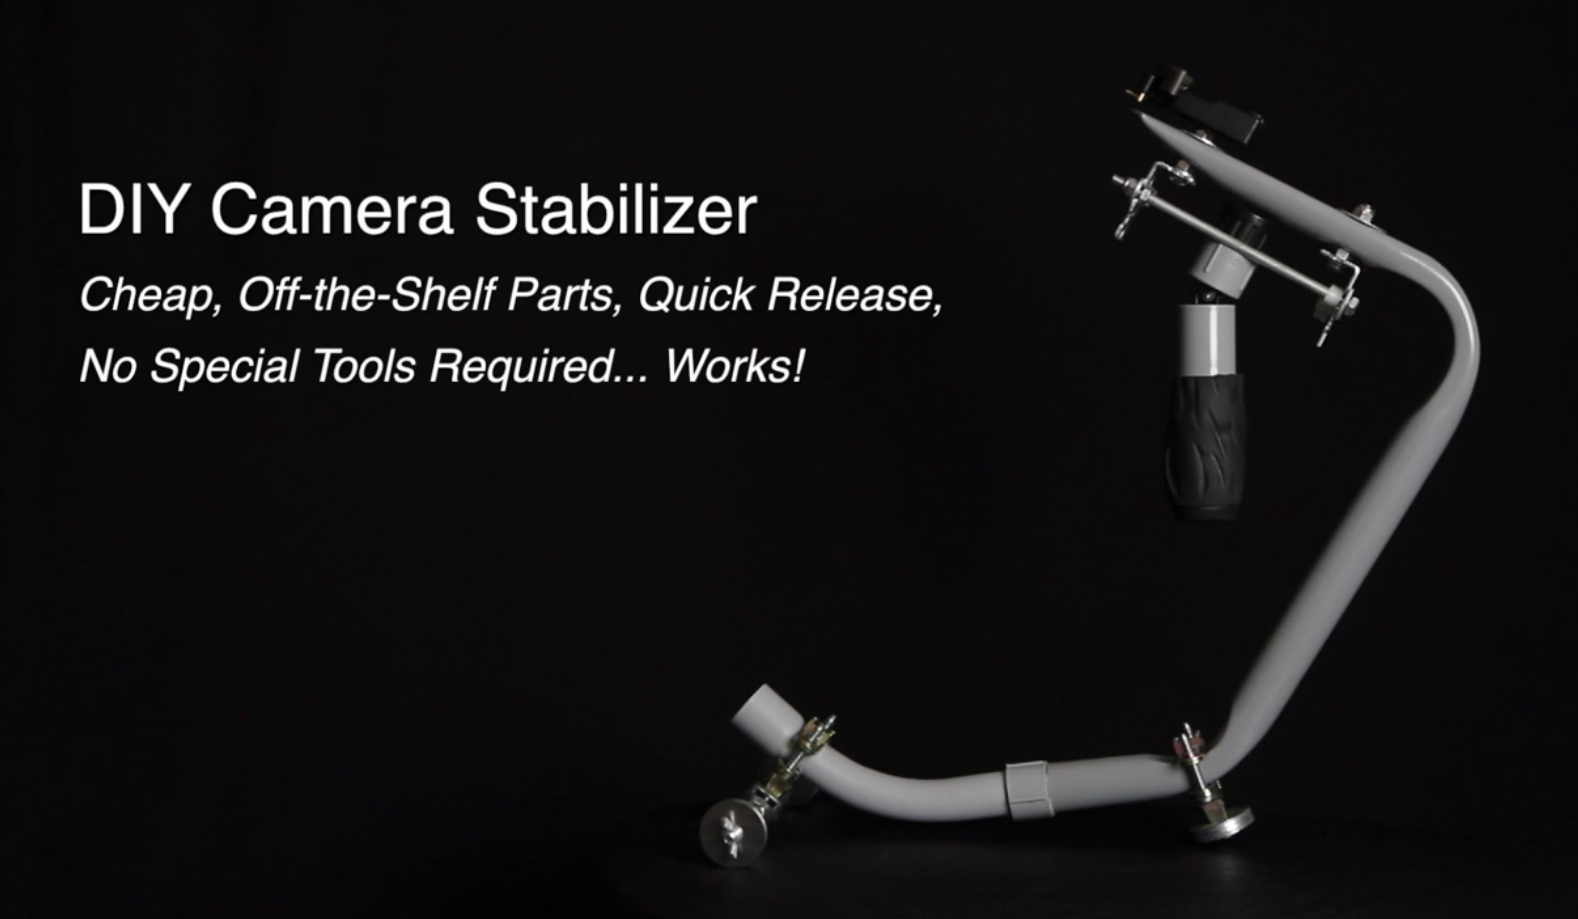
Steadicams are like handheld tripods that hold a videocamera on a swiveling base, so that almost any movement you make is isolated from the camera. The resulting shots are flowing, dreamy, and somewhat ethereal (sorta like this).The big wheel scene in The Shining is one of the classic examples, although they used a modified system (also: the notes about the way Stanley Kubrick and director of photography Garret Brown set up the shots for that film is a fascinating read)
Large, Hollywood-quality steadicam rigs cost $60,000. Smaller professional units are available, with compact consumer level units like the Merlin retailing for a bit under $1000.
For many hobbyists, even the consumer price is beyond their budget. So people began to tinker and many DIY alternatives were developed. Johnny Chung Lee made himself famous with his $14 Steadicam website, detailing a simple design that uses a counterweighted pole to shift the center of gravity and help smooth the jitters, although it excludes the concept that makes a “true” steadicam, the gimbal. Read More
Deal of the Day: Leatherman Skeletool on Amazon for $35 (start stuffing those stockings!)

Of all the Leatherman tools I’ve used, the Skeletool is my favorite. Ergonomic and light, with enough tool options to be useful for almost any situation. I paid a lot more than this and have no regrets about it whatsoever. With the holidays coming up, I suggest you grab a few of these for all the handipeople you know. And if you know any adventurers, order a copy of 127 Hours to go with it.
iPhone 4s Video Footage Looks Fantastic
Vimeo user and new iPhone 4s owner Benjamin Dowie (check him on Facebook here) posted a fantastic demonstration of the much-improved video capabilities of the iPhone 4s. As someone who is still blown away with the quality of the camera on the iPhone 4, I have to say this footage looks stunning. Smooth, crisp, fantastic depth-of-field. It’s going to be hard to determine what camera our shows and movies are shot on pretty soon. Still doesn’t appear to be as high quality as the compact Canon Powershot S95 (which adds in additional parameters like 24p frame rate), but that has a bigger lens and possibly larger sensor, and will cost you an additional $340.
You’ll have to click through to Vimeo to experience this in its full-HD glory (unless someone would like to buy Benjamin the gift of Vimeo Plus…).
Human-Controlled Robot Arms Like You’d See in the Movies, Only Now They’re Real
This goes a bit beyond the scope of your average at-home DIY project, but is definitely something that should inspire us to keep pushing our limits.
© 2011 ksl.com | KSL Broadcasting Salt Lake City UT
SALT LAKE CITY — Visualize a robot that can mirror your exact movements, but with remarkable strength and dexterity.
Utah’s premier robot builders have come up with yet another machine that could change the way humans work in dangerous environments.
Engineers at Raytheon-Sarcos in Salt Lake City demonstrated a unique set of tele-operated robotic arms attached to a modified Ditch Witch. With no training at all, one immediately meshes with the feelings and actions of the machine. It mirrored everything one does with their arms, wrists and shoulders.
As Vice President of Operations Fraser Smith describes, “every way you move, your three degrees of freedom in your wrist, the one in your elbow and the three in your shoulder –the slave arms can move the same way you do.”
The robot translates movements with what is called “force reflection.” In the hands of the machine is incredible strength and agility, depending on what is needed to fulfill the task at hand.
What is Vacuum Forming? Here’s a Quick Primer, and How to Make Your Own System
Vacuum forming is a technique used to shape plastic, that forces a thin sheet of heated plastic over (or into) a solid mold by means of a vacuum. It’s used to create a wide range of toys, models, car components, kitchen supplies, refrigerator interiors, boat hulls and more. It’s not something so common that you discuss it with your neighbors and relatives, but is actually pretty simple and achievable at home. Here are some tips on how to get started, cheap and easy.
Instructable: Make a good, cheap, upgradeable sheet plastic vacuum former
A thorough step-by-step on how to make a simple setup using your home oven, some window screen frames, a shop vacuum and a few spare supplies. Super basic but effective system.
