Anodize Aluminum at Home with Everyday Materials

Anodizing is a process that builds up a very thin but strong protective layer on the surface of a non-ferrous metal. It is achieved using chemical/electrical oxidization, and is most commonly done on aluminum , but occasionally also seen on titanium, silver and other metals. If you’ve ever seen one of those blue or red Maglite flashlights (and I’m sure you have), you’ve seen anodized aluminum. The color comes from dyes that are used after the anodizing process to give it color before sealing the surface layer tightly.
Although aluminum anodizing is often done for large-scale commercial uses, the process is reproducible for smaller home-brew projects using easy to find chemicals and containers (like plastic coolers). The best set of DIY instructions around come from Ron Newman – he has a detailed breakdown of each step, and even sells the solutions and kits to get you started. Here’s a simple overview:

• Soak aluminum part in cleaning solution
• Etch part in caustic lye solution
• Desmut (done if etched or for certain aluminum alloys)
• Connect part to positive electrode of power source, with cathode (negative electrode) submersed in anodizing solution. Submerse for one hour.
• Dye
• Seal part using nickel acetate sealer
Of all the steps, the most involved is setting up the power supply to charge the solution and cause the anodizing process to occur. A battery charger is a simple tool that can work here, although Newman’s writeup says to use a somewhat pricey rectifier to help control the current to the proper level to get decent results. Other anodizing pages such as from Steve Mass and Bryan Pryor suggest that the battery charger can be difficult to monitor and control – they prefer using a dedicated DC power supply instead.
Caswell plating sells supplies for anodizing – check with them for materials.

On a larger, industrial scale, full factories are used to anodize oversized pieces of metal for building purposes. The general process is the same though.
Now, lets say you need to remove the anodizing for some reason or other (perhaps you don’t want your paintball gun to look like a pink and blue easter egg anymore). The system is pretty straightforward:
You can strip off the existing anodized layer from any anodized part by placing the part in a caustic solution for an hour or so. Just mix a few tablespoons of lye and water in a plastic container. Wear eye protection and rubber gloves for this procedure!! Place the part in the solution and monitor its progress.
The Lye will dissolve the old anodized layer, about .001″ thick. It takes a while for it to start breaking through the layer. It’s a little slow at first. The first ten minutes or so not much action will be seen. Bubbles and smut will rise up as an indicator of its progress.
Or, you can use a parts washer like this video shows:
And, as mentioned above, you can use this technique on other metal types. Here’s a demonstration of anodizing a bar of silver:
Finally, one more page with a full rundown on the anodizing process: DIY aluminum anodizing
Now, go anodize some stuff! Car parts, bike parts, water bottles, pizza peels. Let your imagination run wild, just like the wild colors you can use.
Guitarist and Musician Project: Make Your Own Digital Delay Pedal

This is a low-cost, easy to follow project that appeals to all of us who have wanted to sound like a guitar god at some point. Delay pedals are a staple effect of so many musicians these days. Take U2’s The Edge; his sound is almost entirely based on the use of delay.
The Instructable for this project goes light on the actual electronics, but fortunately many more detailed writeups exist already. The case for it gets more attention, and you can tell – it looks professional.
One note that is made in this interesting piece by RG Keen on the economics of pedal building – if you’re doing this to try to save money, don’t. Cheap delay and effects pedals can be bought new for as low as $20 – and used for even less. But there is a real value in building something yourself, so make sure to calculate that aspect in as you prepare yourself to embark on this project.
My schematic is largely (read: almost entirely) based upon Casper Electronics’ EchoBender pedal, which is in turn largely based on Tonepad’s Rebote 2.5 Delay pedal, which is in turn, more or less, based upon the example schematic in the PT2399 datasheet. Having breadboard all three, I personally can not hear a significant difference in sound between the Casper Electronic version and the one on Tonepad, which some people say is superior sounding (the one in the datasheet just sounds flat). The nice thing about the Casper Electronics version is the inclusion of a feedback pot, which gives a really full sound to the echo effect.
You will need:
(x1) “BB”- sized Steel Enclosure
(x1) PT2399 Echo Processor
(x1) TL072 low noise op amp
(x1) LM7805
(x3) 100K potentiometers
(x1) 50K potentiometer
(x1) 5K potentiometer
(x1) PCB
(x1) DPDT stomp switch
(x1) SPST toggle switch (SPDT okay)
(x1) Power jack (with cut-off)
(x2) 1/4″ mono jacks
(x5) Knobs
(x1) sheet 1/16″ santoprene rubber (McMaster-Carr 86215K22)
(x1) sheet 1/8″ cork
capacitors:
(x1) 100uF
(x3) 47uF
(x1) 4.7 uF
(x6) 1 uF
(x3) 0.1 uF
(x2) 0.082 uF
(x3) 0.0027 uF
(x2) 0.01 uF
(x1) 100 pF
(x1) 5 pF
resistors:
(x2) 1K
(x11) 10K
(x2) 15K
(x1) 100K
(x1) 510K
(x2) 1M
Recipe Video: Cooking Koshari – Delicious Egyptian Vegetarian Dish
Koshari is a traditional dish from Egypt, one that tastes so good I can’t stop eating until nothing is left. The dish has many parts, all of which are pretty simple but combine together for complete deliciousness: Rice/lentil (referred to as koshari), spicy tomato sauce, macaroni, garbanzo beans and fried onion.
Here is the recipe to make the best tasting koshari I’ve had so far. I’ve based the approximate measurements off of the video I took of Magda and Sandra demonstrating how to cook the dish (very special thanks to both of them for taking the time to let me film this and feeding me).

Ingredients:
Koshari:
1 large yellow onion, chopped
1/2 cup corn oil
1lb lentil beans
2 cups basmati rice
4 cups water
1 tablespoon plain tomato sauce
1 glove of garlic, crushed
Sauce:
(2) 16oz cans of tomato sauce (video says 6oz – was meant to say 16oz)
1 tablespoon corn oil
5 cloves of garlic, crushed
1 teaspoon salt
1 teaspoon pepper
1/2 teaspoon cinammon
2 tablespoon white vinegar
1 green chili pepper or 1/2 teaspoon red pepper flakes (optional)
Pasta:
1lb macaroni, small size (elbows)
1 teaspoon salt
1 teaspoon pepper
Garbanzos (topping):
1 can garbanzos, drained and rinsed
1 teaspoon salt
1 teaspoon pepper
1 teaspoon cumin
1 teaspoon garlic pepper
1 tablespoon lemon juice
Instructions:
Koshari:
– Begin by soaking the lentils and rice in water for about 30 minutes (separately). You don’t want the lentils to get too soft, so don’t over-soak them.
– Chop the onion coarsely – about 1/2″ squares. Put in large stock pot, add corn oil so the onion is covered. For one onion, this was about 1/2 cup.
– Heat on medium-high, stirring regularly. Cook until darkish brown, about 15-20 minutes. Watch closely as the onion goes from dark brown to burnt very quickly.
– When finished, remove onion from stock pot with slotted or perforated spoon. Place onion on paper towel to drain. Keep oil in pot.
– Add one clove crushed garlic to the oil.
– Stir in four cups of water and one tablespoon of tomato sauce.
– Add lentils when the water begins to boil, cover and cook until lentils start to soften (about 20 minutes).
– Once lentils soften a touch, stir in rice, cover, and continue to heat.
– Finished once water is soaked up and the lentil/rice mixture is soft and fluffy.
Sauce:
– Crush five cloves of garlic, put into saucepan with a tablespoon of corn oil.
– Heat on stove, medium-high.
– Add 1 to two tablespoons of white vinegar and two 16oz cans of plain tomato sauce.
– Thin sauce with 1/4 to 1/2 cup of water.
– Pinch of salt, pepper and cinnamon to the sauce.
– Chop a green pepper and add to the sauce, or use red chili flakes
– Cover, bring to a boil, then reduce heat and let simmer for 20 minutes
Pasta:
– Boil water in large pain
– Add one pound small macaroni shape. Elbows work well.
– Cook slightly longer than the directions call for – you want the pasta to be soft.
Garbanzos:
– Drain and rinse a can of garbanzo beans (chickpeas)
– Mix in salt, pepper, cumin, garlic powder
– Sprinkle with lemon juice
Prepare by making a bed of the rice and lentils, add macaroni on top, coat with sauce (the sauce is my favorite part – that vinegar/cinnamon addition makes it so tangy-good), top with garbanzos and fried onions. Serve with a nice cucumber and tomato side salad.
Serves six. Or one, if I’m there.
The DIY Temporary Wood-Fired Pizza Oven Build: Tips, Notes and Photos

As noted in my temporary pizza oven writeup (and reiterated in my “Pizza Obsessives” interview by Slice – check it out!), making an effective pizza oven can be as simple as stacking blocks. Use a quickly made jig to build an easy brick arch roof, and screw a couple pieces of angle iron around it to hold everything together. That’s it – pizza time, all the time.
The ease of the design was demonstrated recently by Thomas Niccum, who used my writeup to reconstruct his own oven. Total time from construction to eating pizza? 10 hours – and that includes transporting a pallet of cinderblock into the back yard one by one.
Niccum was kind enough to send detailed notes and photos of his build. They’ll help you put one together, too. Maybe this weekend – it is summer, after all.
Read More
Template for the Temporary Brick Pizza Oven Arch, How to Determine the Radius of an Arch, and Removing the Jig
The temporary brick pizza oven I helped build got a lot of attention and a number of questions about the jig used to place the bricks into the arch. Here are the details and a rough blueprint:
-Legs: 2×4, approximately 12″ long (extending 9.25″ below the arch). Qty: 2
-Arch: 1/2″ plywood, 32.25″ wide, 5.25″ at its peak. Qty: 2
The legs extend below the bottom of the arch 9 1/4″ – however, the exact height was adjusted on-site (by cutting part of them off) by the instructor to match up with the size of the bricks he used. In order for the arched bricks to lock into place, you want the bottom edge of the arch to be just below the walls. On our oven, we did a stack of bricks on their side (about 9″) and one layer laying down (about 2″) . Measure your bricks and adjust the height of the arch accordingly.


The two legs are screwed in between the two sides of the arch
To draw the curve, you want to know the radius of the arch you’re building. After doing the weekend class, the instructor gave me the jig we used, but no specifics on the dimensions. Using an online circle calculator with the measurements of the arch height (5.25″) and the chord length (straight-line distance between the two ends of the arch; 32.25″), I was able to determine the radius of the arch to be 27.39″. With the radius, you just need to make a line at that length, one end fixed and one with a pencil attached to it, and use that to draw the curvature.
If you don’t have internet access and need to figure out the radius, here’s the equation:
radius = (rise2 + (1/2 width)2) / 2 x rise
rise is the height of the arch
width is the length of the chord
Attach the two pieces of plywood with a few screws before cutting, and cut them as one piece to ensure that the curve matches. Use a jigsaw or a router set up to cut curves. Ultimately, the bricks will settle a bit so the curve doesn’t have to be cut perfectly, but try to get it close to make things easy.
Finally, I’m finished using my jig and am selling it cheap – anyone who is looking for one but doesn’t have the tools/time to make it (which would be weird, if you’re planning on building this oven), contact me via the link at the top of the page.
Good luck building!
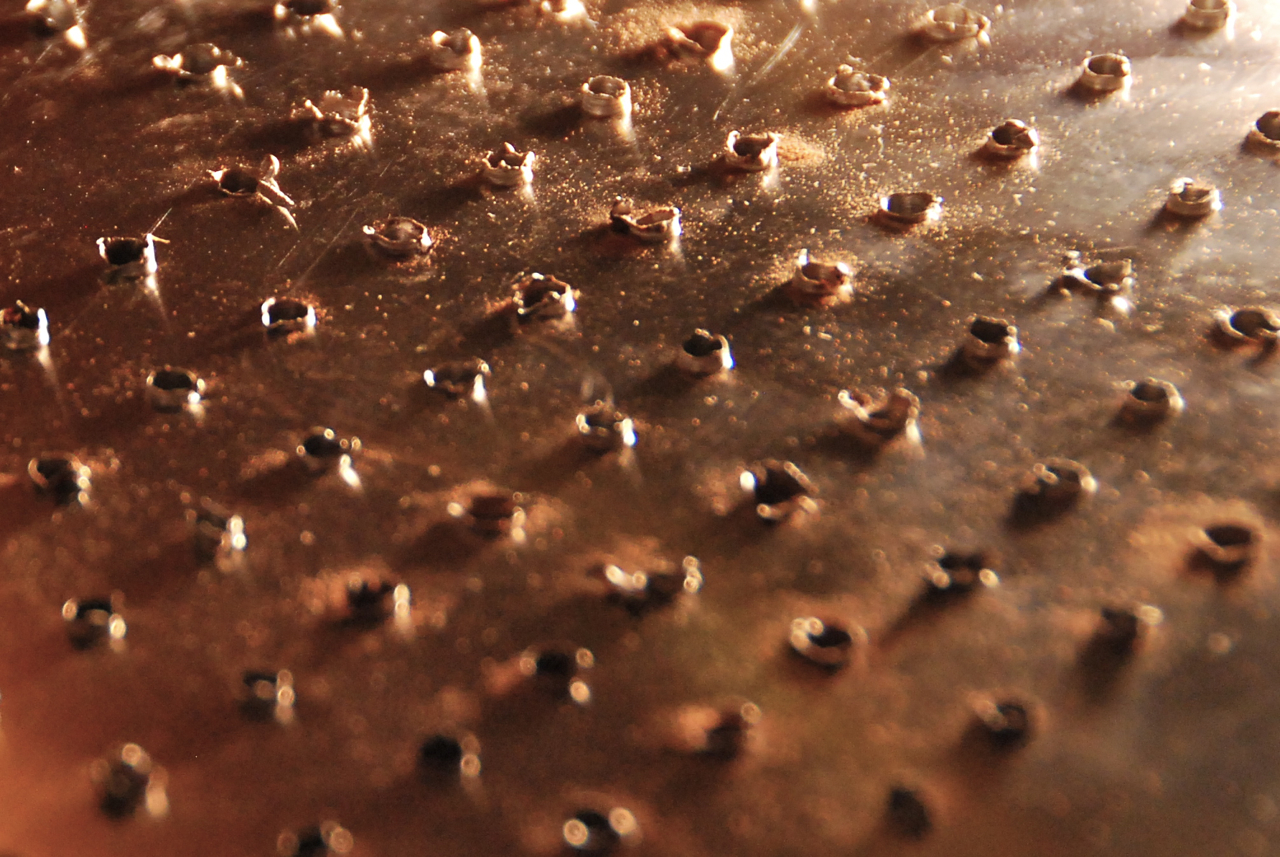
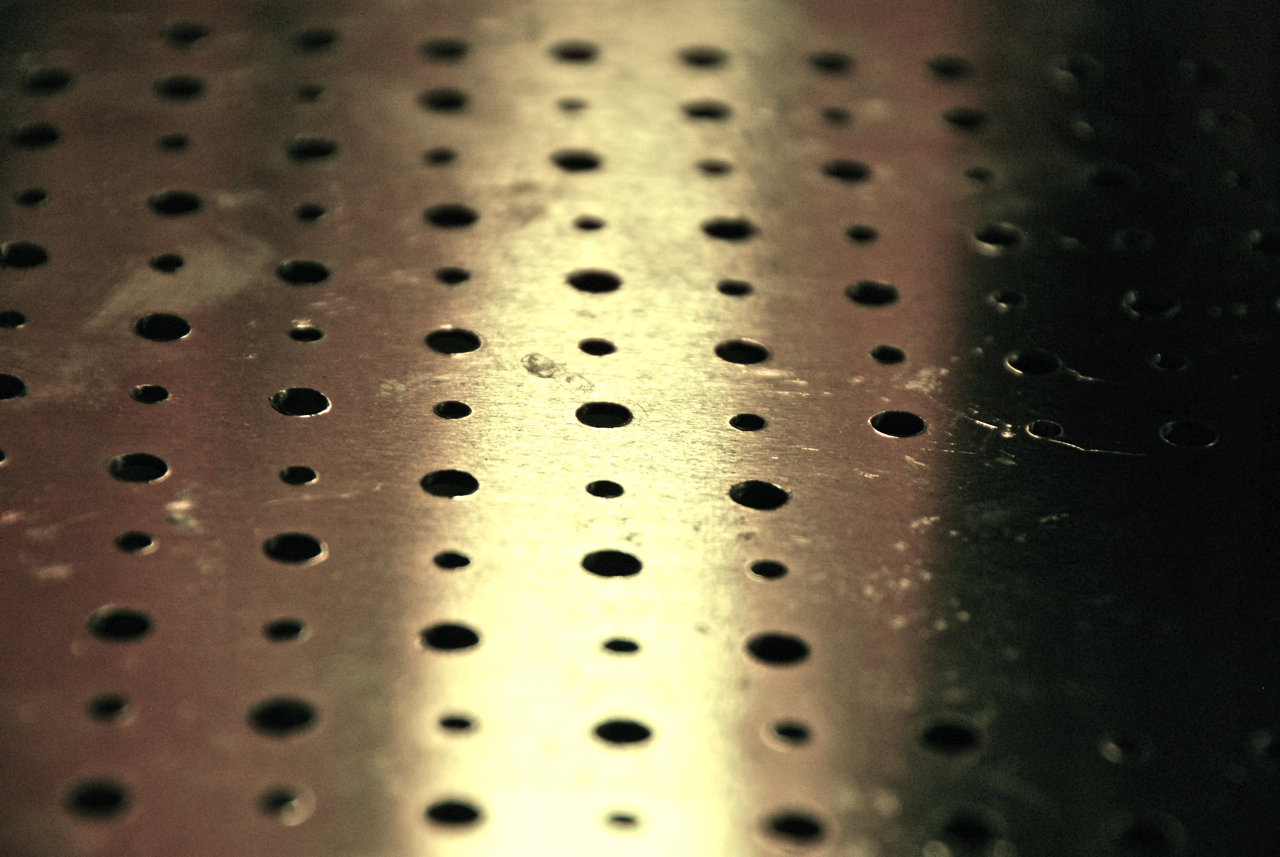
Make a Perforated Pizza Peel for Improved Pizza Making
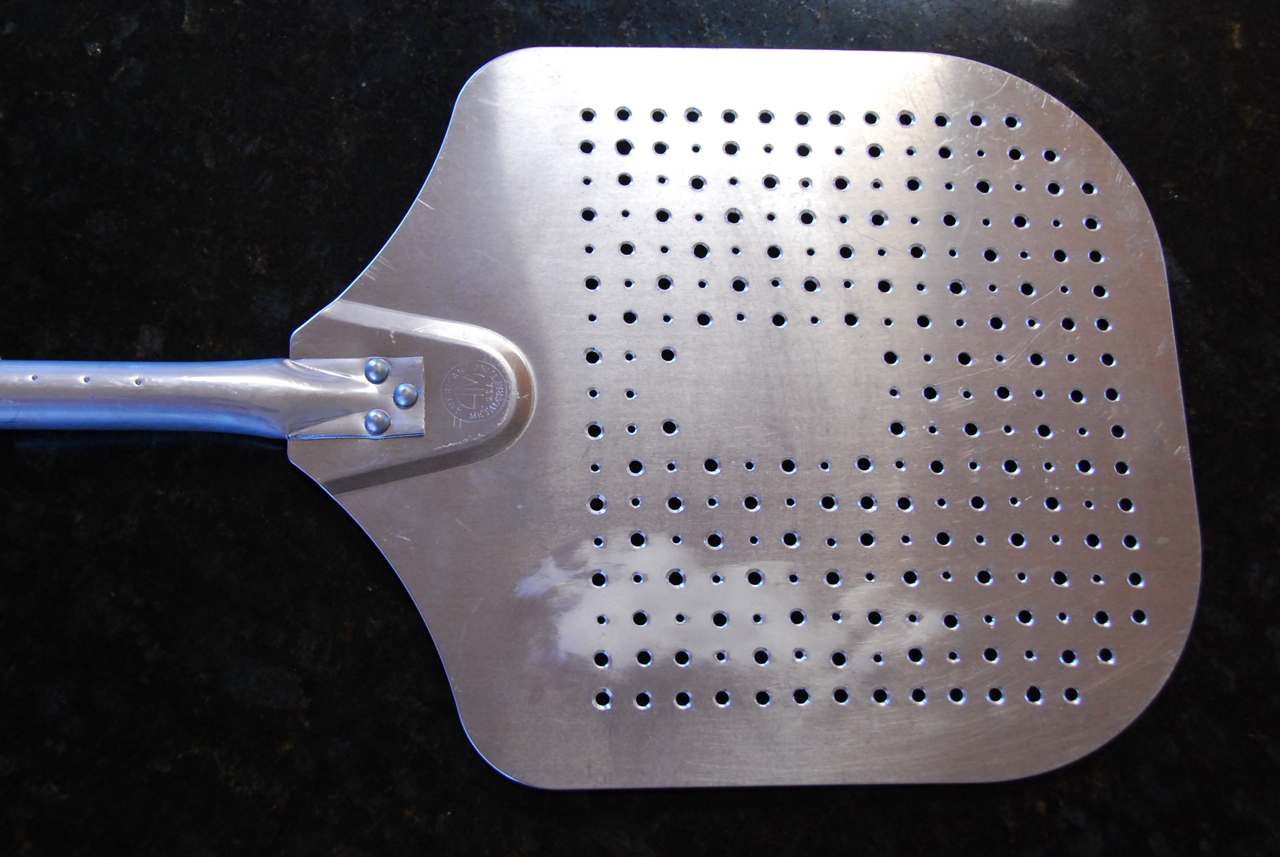
After getting to use Pizzahacker’s perforated pizza peel, I decided to make a DIY version for myself. The idea behind a perforated peel is that it reduces the amount of flour that gets underneath the dough when placing it in the oven (too much flour will brown up and taste bitter), and possibly helps keep things from sticking by reducing the amount of friction underneath the dough. Here are the steps I took to make mine; results of how well it works will be posted shortly.

Materials needed:
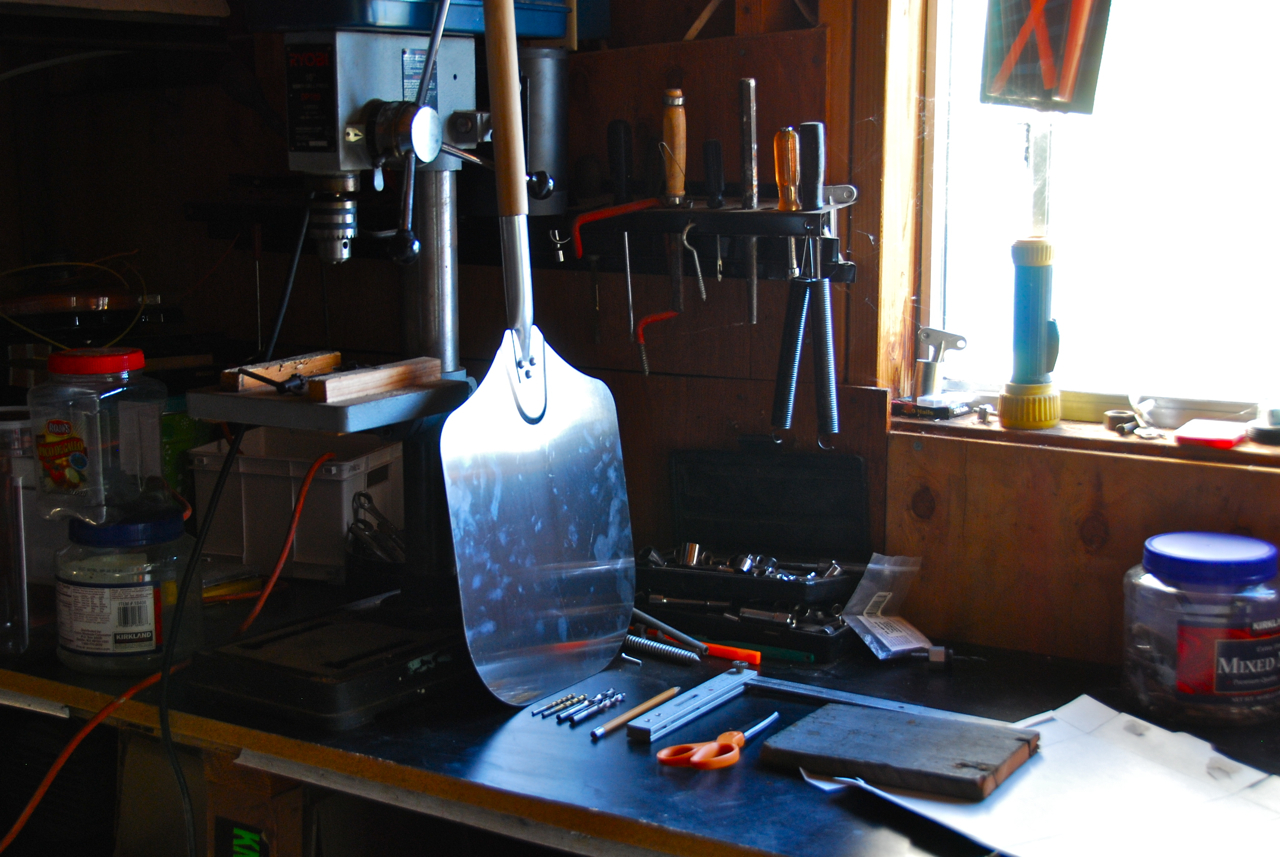
-Aluminum pizza peel (I’m using a 12″x14″ peel that works well for my oven and pizza size)
-Drill press
-Small drill bit (about 1/16″)
-Slightly larger drill bit (~3/16″)
-Larger drill bit (3/8″ or 1/2″) or countersink drill bit
-Flat piece of cardboard (I used a cereal box)
-Two printed pages of the perforation template (PDF) (A grid I made that has the holes place every 1.5cm.)
-Flat piece of scrap wood to go underneath the peel when drilling
-Pencil, masking tape, ruler and scissors
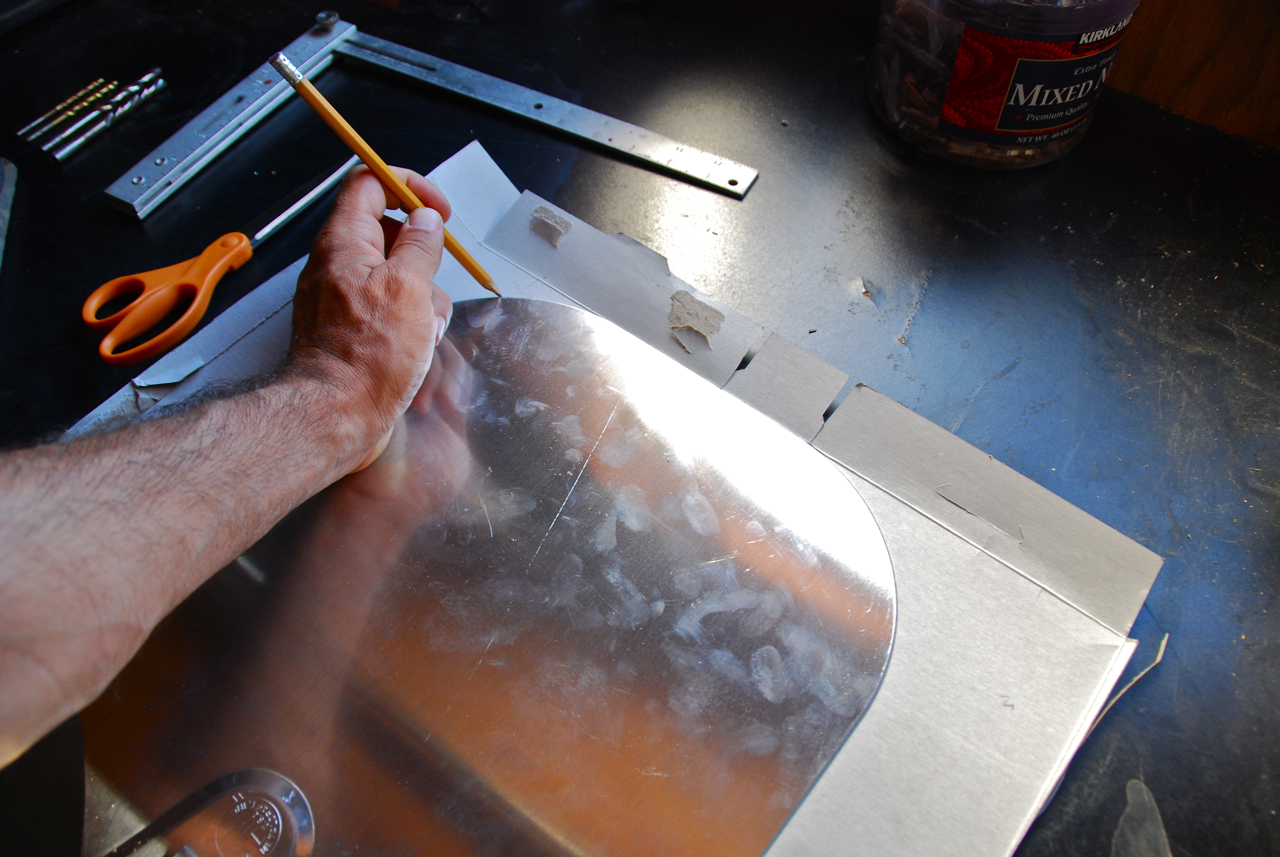
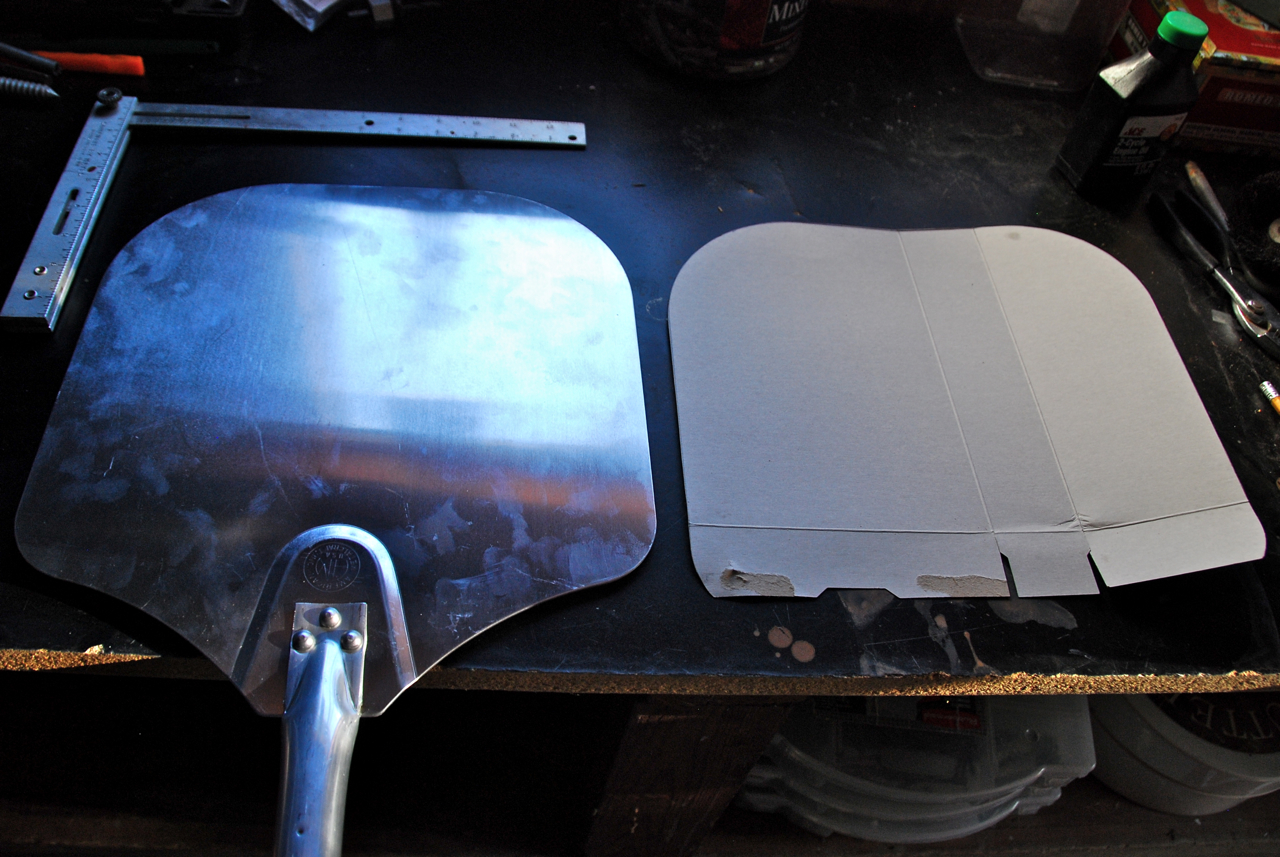
Step one:
Trace the outline of your peel on the cardboard. Cut the coardboard to match the peel. Find the halfway point (left to right) on the cardboard and mark it with a line.
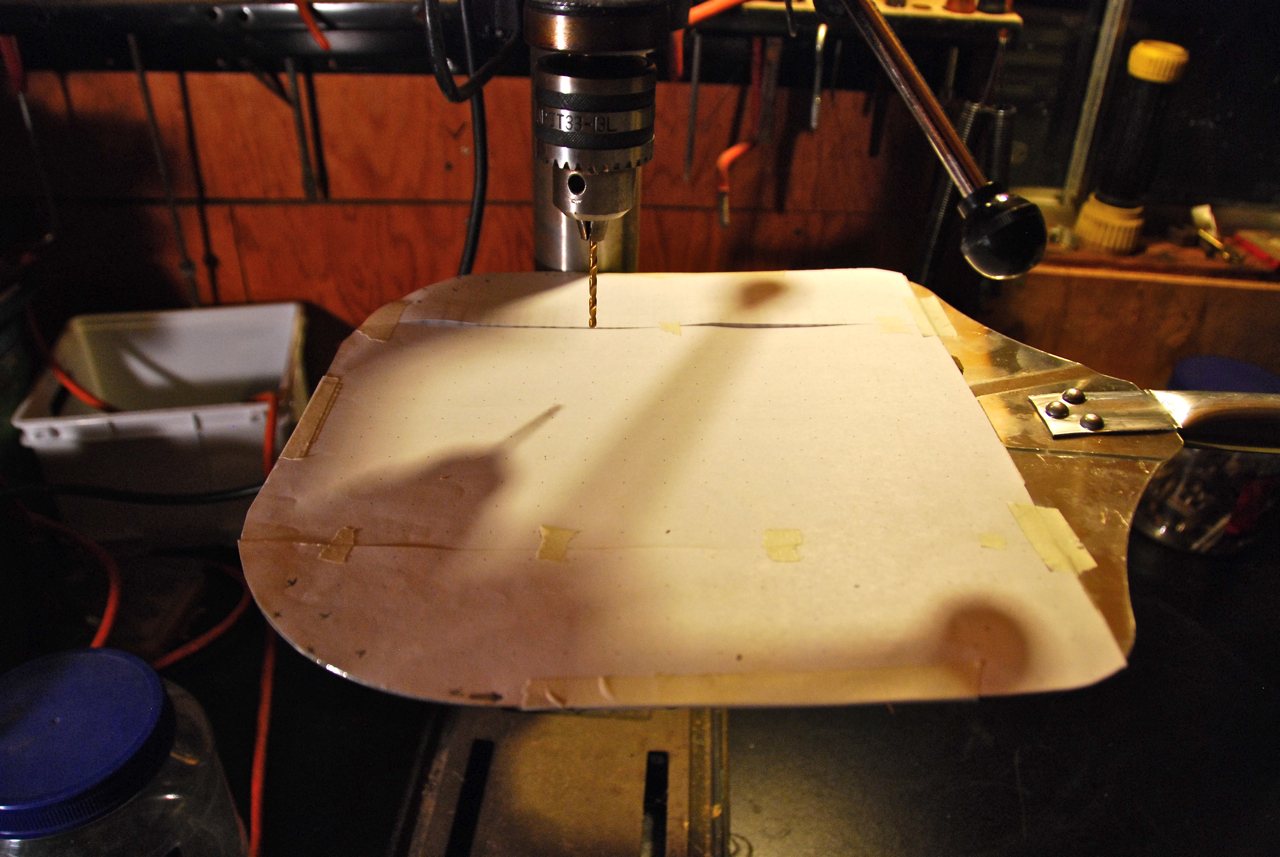
Step two:
Place the center dot of the template printout to match with the center line on the cardboard. The center dot is the seventh dot over.
I decided to leave a small gap in the front of the peel, so my placement had the printout taped to the cardboard portrait orientation, with the larger margin on the top edge.
The paper won’t be wide enough for the cardboard, so cut a strip from the second printout for the left and right side, and line it up with the dots on the first piece. Tape in place, cut around the the cardboard and tape the whole thing to the peel.
Mark which holes you don’t want to drill – I crossed them out with a pencil to leave a margin on the top and sides.
Step three:
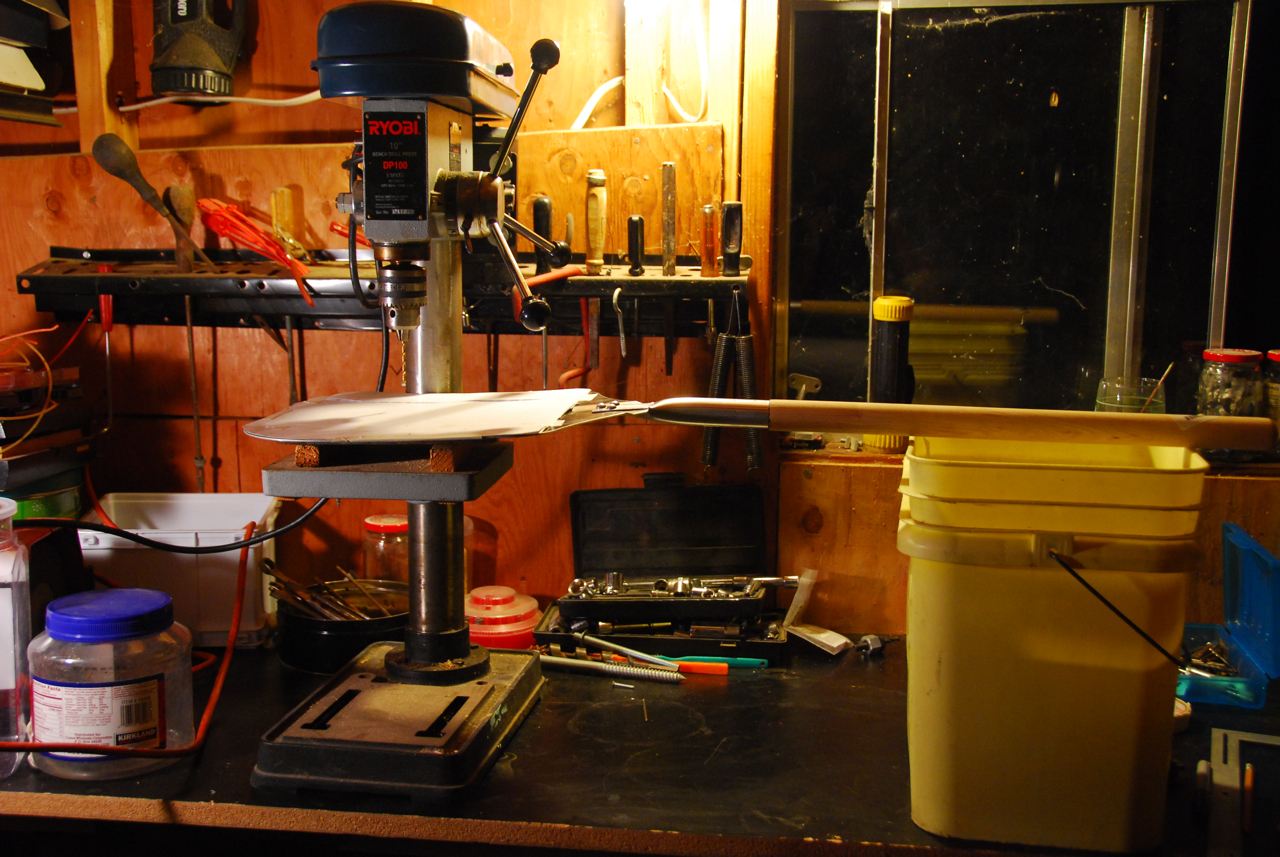
Put the small bit into the drill press (if you don’t have a drill press, a hand drill will suffice but will add some tedium to the project). Place the scrap piece of wood underneath the peel to help minimize distortion. Slowly drill through each dot on the template.
With the 10″ drill press I was using, there was one small section in the center that I was unable to reach. I decided to leave this as-is, instead of doing it by hand. I don’t think it will make a big difference. Also, I used a small bucket as a riser for the handle of the peel, but make sure the level is pretty close – you want the surface to be as flat as possible so you don’t end up bending the aluminum.
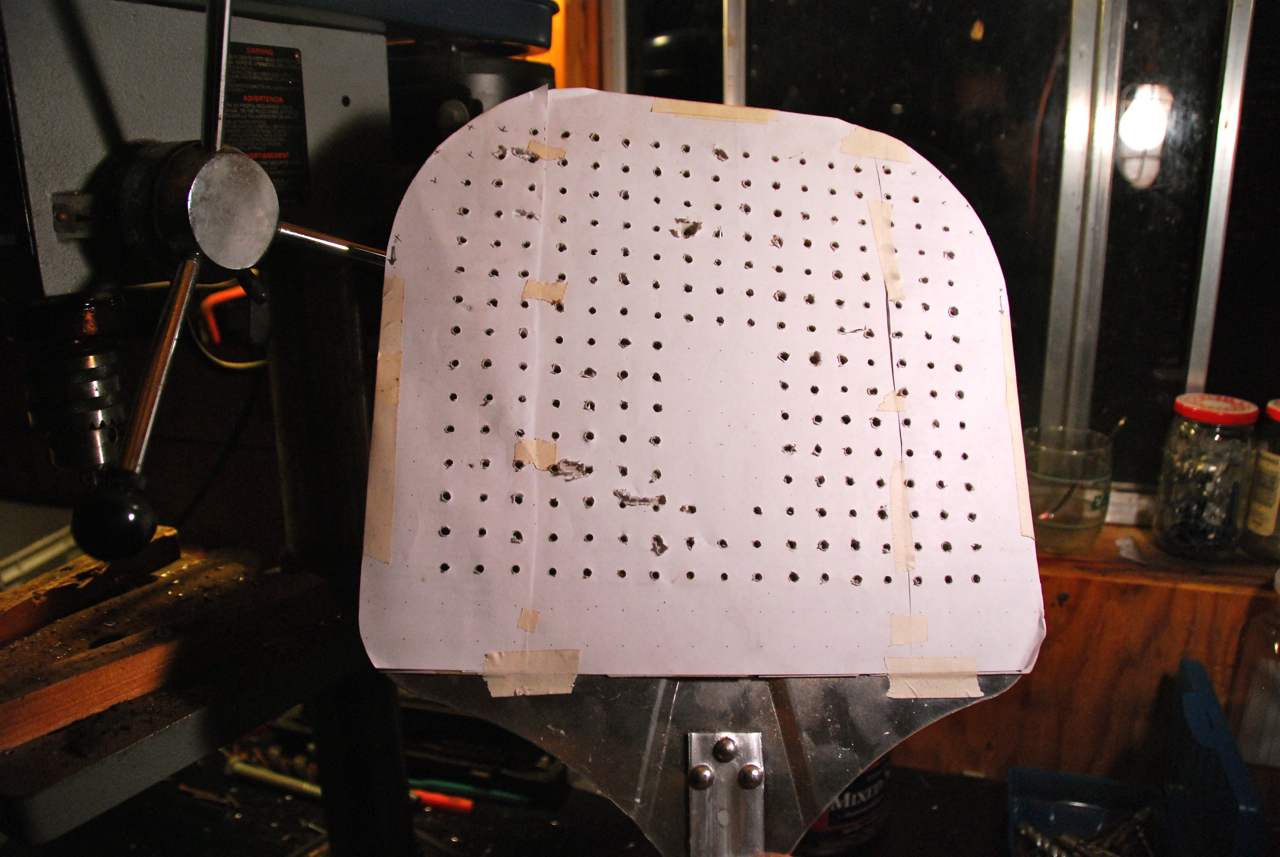
Step four:
Using the middle sized drill bit, carefully enlarge each hole.
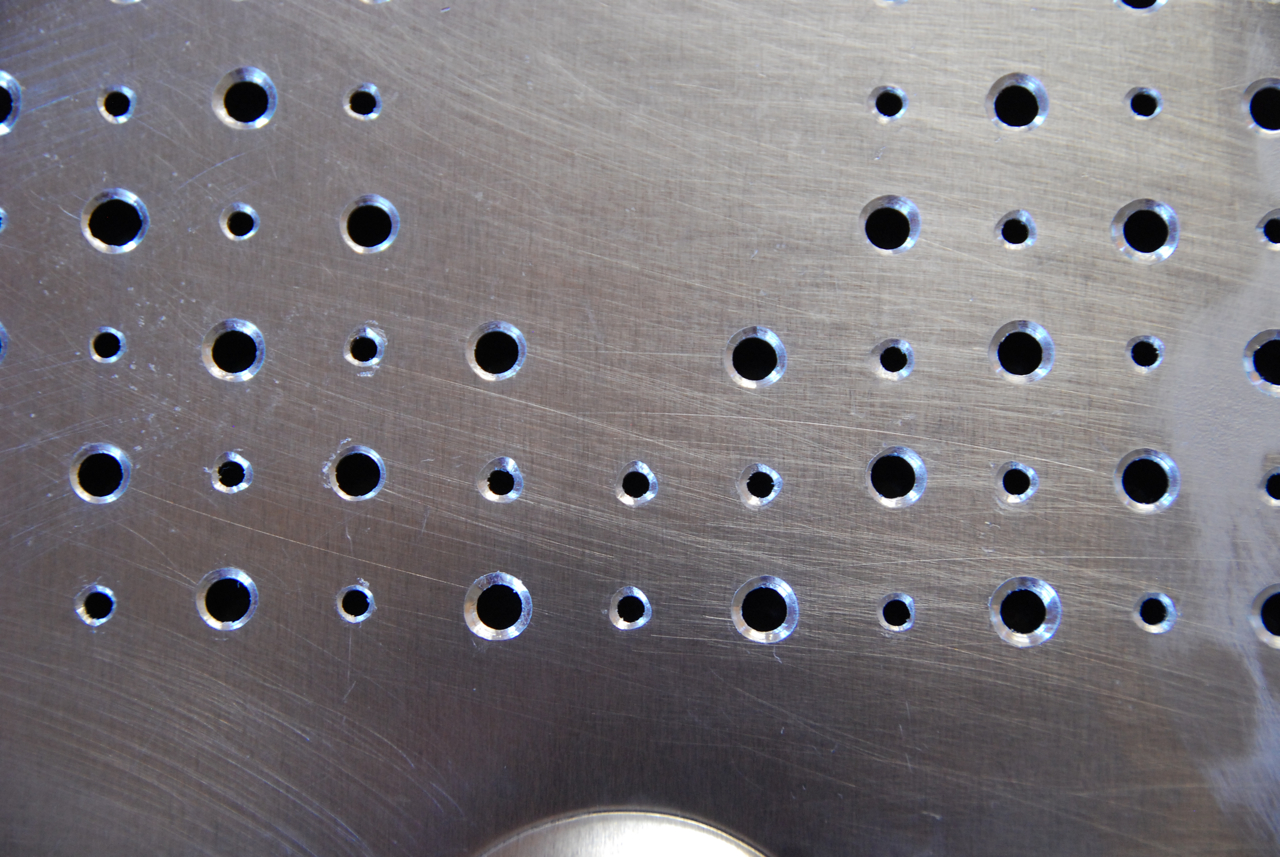
At this point I started to wonder if I was going to compromise too much of the peel’s strength so I opted for an alternating pattern of small holes and larger holes, with the front edge and both sides larger holes.
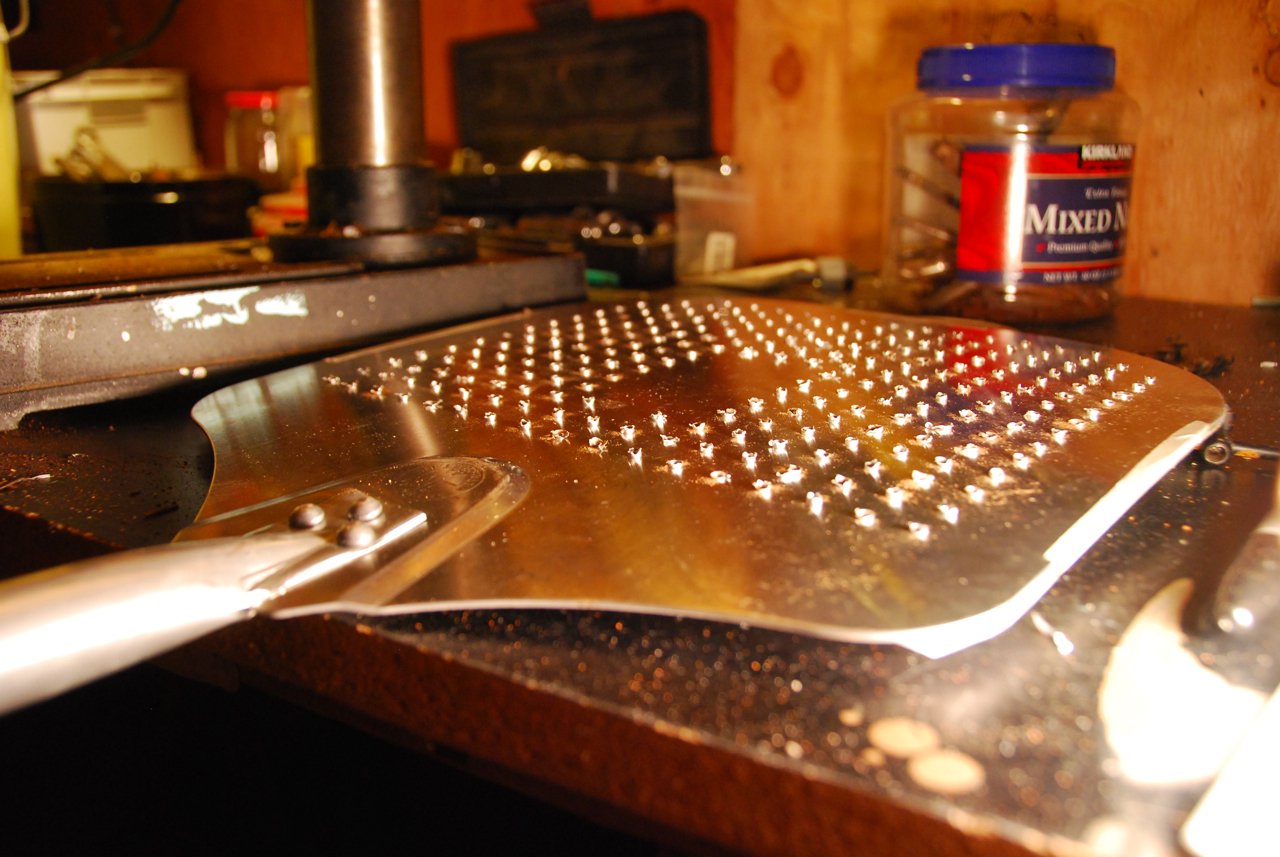
Step five:
Remove the cardboard template. The top holes will look pretty good, but you’ll have a fair amount of flanging coming off the drilled holes. Using the largest of the three drill bits (make sure it has a very slightly tapered head), VERY slowly drill the excess off the peel. Bevel the edges by pressing just part way beyond the surface of the peel. Do this for all the holes, flip and repeat on the back side – this will give you a nice smooth surface.
One thing not to do: wire brush on a grinder or drill. This won’t take the flanging off the drilled holes, but will leave a roughed-up, pitted area.
That’s it! Perforated pizza peel ready for action.
CNC Milled Aluminum Tape Dispenser
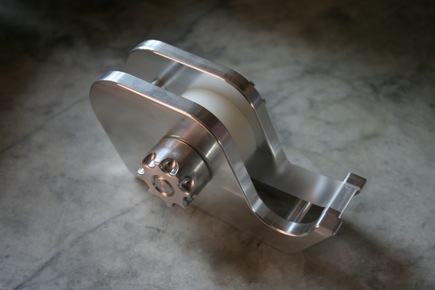
I’ve been gathering materials and information to build a CNC machine for a while, but keep putting it off because I haven’t thought of any exact application I need one for just yet (aside from milling a Hellraiser-style cube). Then I saw this: a CNC milled all-aluminum tape dispenser. A 1lb thing of beauty. Beautifully crafted, ready to deliver whatever length of tape you need, short or long.
This project has kick-started my creative juices with a whole slew of fun CNC projects. Of course, anything done in metal will need a sturdy machine (the great book Build Your Own CNC Machine has all the steps and templates to make one from MDF), but I can envision a wood version of this tape dispenser that would look super kickass as well.
It’s absolute overkill. Over a pound of 6061 aluminum, every part CNC machined and yes, it’s just a scotch tape dispenser. This is the creation of the Advanced CNC class at Laney College as taught by Bob Rice. I programmed and machined all the parts from drawings using MasterCAM, a Chevalier toolroom mill and a Haas SL lathe. All the threads were single-point cut and threaded holes rigid tapped. Every part required at least two operations, every face is machined.
Check out a few more details and photos here. Also, AcuteAero is doing some seriously cool projects – electric bikes, skateboards, etc. – I recommend checking his site out.


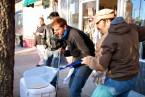
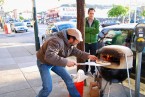
Wood Fired Pizza On the PizzaForge BBQ Oven with PizzaHacker

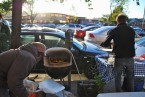
Jeff Krupman (aka PizzaHacker) is doing some very cool things in the pizza world. His oven, dubbed the PizzaForge (formerly called the FrankenWeber) is a true wood-fired pizza cooker that is ingeniously built onto a ubiquitous Weber 22.5″ grill. Even better than having designed a compact oven that can hang with the best of them, he’s sharing his creation by hitting the streets and selling his pies all over San Francisco. And, he’s fine-tuning the design and will be selling it commercially very soon. Totally awesome.
I first heard of Jeff in early 2010 when a few big blogs posted about his oven and pizzas (Make blog; Lifehacker). After exchanging emails and a quick meetup in LA a couple months ago, I got the chance to test Jeff’s pizza at an art event last Friday while visiting San Francisco. My excitement compounded when he asked if I’d like to be on oven duty for the night, as his regular helper was unavailable. Three hours of pizza making in San Francisco? A dream! I wish every Friday could be like that.

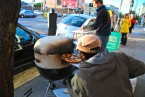
The pizzas cooked better than any I’ve ever made before, besting the one I made in the temporary oven last year. You just can’t beat the hot temperatures of burning wood and the convection of the shallow dome. 90 seconds per pizza, just like the best pizzerias do it. Jeff only uses top-grade ingredients as well, and the art gallery patrons were all quick to purchase and devour as many pies as he could make. The three hours passed by in a blink of an eye.


Jeff warned me that by the end of the night my mind would be swirling with thoughts, ideas, redesigns – he was right. He’s onto something phenomenal and his latest version of the oven shows some serious progress from the original version, and the next iteration should have some nice improvements that he described to me. I’ve got a list of ideas I’d like to see him add to it too.
One of my other discoveries was the excellence of the perforated pizza peel that Jeff uses to place the pizzas in the oven. Anodized aluminum construction, with slotted perforations that help the dough resist sticking (a problem that all pizza makers fear) and a knife-blade edge for ease of getting the dough on and off. The peels are expensive, and worth it. I’m going to be drilling my standard-issue metal peel to attempt a DIY version and will report back with results.
Deal Of The Day: Makita 18v Lithium Drill/Driver With Hammer Mode – $149
Just in time for father’s day – or just a treat for yourself – the Makita 18v lithium drill/driver is a kickass tool that lists for $398, regularly sells for $197 ($199 at Home Depot) and today (Sunday, June 6) is available for $149. Comes with hard case, TWO batteries and charger.
One of the guys on the Catch It Keep It crew had this drill so I got to use it a lot – it was easily the best drill we had in the workshop, and I’ve been looking for one for myself for a while. Lightweight, powerful. Good torque. Very nice ergonomics.
Get it here! A few other one-day tool deals available here as well.

The Hexapod Robot “Best Of Dance” 2010 Video
Upper Austria University of Applied Sciences has a hardware-software design program with a fantastic competition: Hexapod robot dance-off. I don’t know much about it as of right now but I am going to do some serious research because this looks like a great program.
From the Youtube description:
We are proud to present the best of dance compilation from the 5th Hexapod Championship held in April 2010. Get behind-the-scenes footage at http://www.youtube.com/watch?v=OV6nKXydHv8


Hi, I'm Mike. I’m the executive editor of Make: magazine, and host of Discovery channel’s Punkin' Chunkin' and Catch It Keep It, TV shows where I build and explain crazy machines that crush stuff, blow things up, shoot fire, all in the name of science.
I've previously worked at Wired and ReadyMade magazines, writing about how to utilize new technology in our everyday lives.
This site is where I keep a list of instructions for fun projects I've done, am working on, or draw inspiration from. I encourage everyone to get involved — get up and do something!