DIY Builder Holiday Buying Guide – Gift Tips
A few Holiday suggestions that I’ve been enjoying this year, for the science geek/builder/pizza fanatic in your life.
Tools
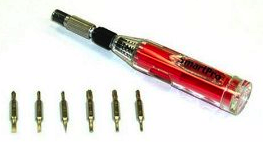 Flexible shaft precision screwdriver: Don’t tell Apple but I’ve taken my Macbook apart plenty of times, made easy with this mini-screwdriver. It has 6 double-ended bits: standard, philips and torx. The shaft can be extended out of the body to snake it around those tricky corners, great to remove that one metal strip that the RAM modules hide behind. I got mine at OSH.
Cameras/Video
 Canon 7D: I don’t have this but I want it. Bad. Like, I might sell my Nikon gear because of this camera. Its the next step in the game-changing video enabled DSLR realm. And at $1699 for the body, you get access to film like effects that were only available on cameras costing over $100,000 a few years ago. Check out the sharpness and rich color.
Kodak Zx1: The Zx1 is Kodak’s response to the Flip. 720p HD video, and shoots 30 or 60fps. The video is sharp and clean, but like the Flip, the lack of image stabilization and optical zoom made me want something more. I got mine for about $100, but it needs an SD card so factor that in to the price.
I used it to film this clip of a catapult launching a bowling ball. Here’s another good example of its quality.
Panasonic FX37: I bought this directly from that desire for image stabilization and optical zoom. I dig this camera because it’s got a wide-angle lens that is fairly fast – more useful for low light conditions than the Powershots that I always buy, although not as impressive as the amazing Panasonic LX3. This FX37 is being phased out, so you can get some good deals on it. I got mine for $169 at Sixth Avenue Electronics.
A side-by-side comparison of these two cameras is on its way.
Pizza Supplies
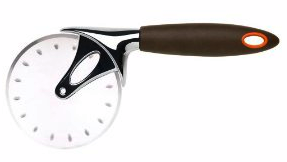 Mario Batali Pizza Slicer: As mentioned in my post on building a temporary pizza oven, the Batali pizza slicer is amazing. $15 and worth every penny.
Bike Gear
Blackburn Mars 3.0 rear bike light: I wrote about this in Wired a few years ago. Still the best rear bike light I’ve found. $16. While at it, build your own mega-bright LED front light.
How to Clean and Deodorize Your Wetsuit

Any regularly used wetsuit will start to develop a mildew stench, especially if left wet in the trunk of your car or floor of your closet. I’m no fan of squeezing into a bacterial bodysuit so I undertook a week-long project to de-funk my wetsuit.
The process: Each day I used a new method of cleaning, trying to determine which one was the best for bringing a fresh neoprene smell back to my morning sessions. This study was hardly scientific – there was no reset and no control group in any way at all. The only thing determined is, “can you really get the stink out of a wet suit?”
Here’s what I did:
Day 1 – Soak for 60 minutes with Seventh Generation non-toxic soap (30 minutes inside and 30 minutes outside), rinse in the shower. Surf the next day.
Day 2 – Soak for 45 minutes in Joy anti-bacterial soap (inside and out). Rinse. Surf.
Day 3 – Soak for 60 minutes in a mix of white vinegar and listerine. Rinse. Surf. This step seemed to make the biggest difference.
Day 4 – Soak for 60 minutes with generic Wool Wash gentile garment. Scrub with a very soft brush. Wow did the water turn brown.
After these four days of cleaning, I’m happy to say that the smell was markedly improved. I’ll be monitoring it to see if the smell resurfaces over time.
Read the details on El Porto Fridays: Cleaning My Used Wetsuit to Get That Stink Out
Update 1-09-12: A little over two years later, with regular rinsing, the Oneill never re-developed a strong mildew odor. I just replaced it with a new suit for winter time (too many leaks for the cold water), and gave it a good soak and rinse in the woolite soap before hanging it up for possible summer use. There’s no smell at all, sleeves or elsewhere. And the booties I bought a bit over 2 years ago just got a listerine rinse that has my gear bag smelly like a sanitized dentist’s sink.
Build a 3D Camera Rig from Canon Powershot Cameras
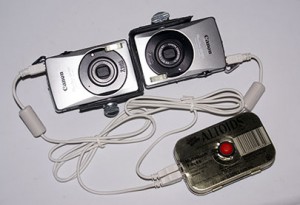 Shoot your own “In your face!” photos – very rad. This project is from MaximumPC.
Overview:
– Install the StereoData Maker script onto two CHDK-modifiable Canon Powershot cameras. The script allows the cameras to be triggered through their USB ports. The page lists the compatible cameras; I use the Canon A460 – it was cheap!
– Mount the two cameras side by side, on an S-bracket.
– Use an easily built, two-camera USB switch to simultaneously take photos. A 5v power source (three AAA batteries) will actuate the shutters.
– Process the photos using StereoPhoto Maker software, which calibrates the images and assembles them into a 3-d viewable photo, just like the classic movies.

Up next: experimenting with the video mode of the cameras, then extracting the individual frames (easily done with Quicktime Pro), processing those with StereoPhoto Maker, and reassembling into a classic 1950’s 3D movie experience. Coming soon!
Skate and BMX Bike Ramp Plans Roundup
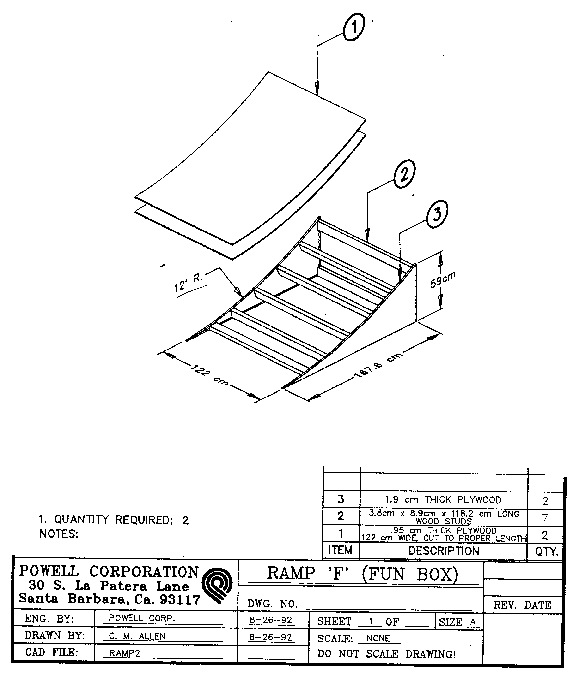
One of the best things about skateboarding is the DIY mentality that it encourages, from maintaining your board to building your own ramps. And thanks to the internet, nowadays there are loads of free and cheap plans for building skateboard and BMX ramps online. I’ve got through many of them to get a sense of what they various sites offer, and am posting my notes on them here.
It’s a good idea to double-check these sites as a lot of them seem to be updated with new information periodically.
Xtreme Skater: Seven free plans, from mini-half pipes to grind boxes. The plans include concise part lists and handy step-by-step instructions with many helpful photos. Currently, there’s nothing between their 8′ vert ramp and 3’6″ mini-half pipe, unless you modify their 4′ quarterpipe plans. The site also includes many useful tips on construction and materials.
Ramp Plans dot org: Compiles info about a number of different ramps that have been built with links to their construction plans. Not as detailed and navigable as Xtreme Skater’s site, but lists more ramp type options (the pool project is impressive). Their forum and FAQ are full of great information.
Whitefish Skateramp Company: Sells partial ramp kits and traceable plans. Plans cost around $50-$75 depending on the design. Partial kits come mostly-precut and pre-drilled – a handy resource for those needing to assemble a quick skatepark setup. They have kits for street ramps to half pipes, and will consult with you on bowl and full skatepark design. The 6′ tall half pipe for $960 is an attractive project, although sheeting, hardware, and freight quickly jacks that price up.
Skatoramps: Instructional ramp plan e-booklets for different ramp types, starting at $15. $65 buys you the entire collection. Claims to have the best design for a half pipe, with an estimated price of $600. At a narrow 8′ width, you should expect to double that price to make the ramp more skate and bike friendly.
OC Ramps: Another company providing pre-cut ramp kits. Currently, they only have grind boxes, quarter pipes and hal fpipes listed. 3.5′ x 16′ half pipe costs $3488, including surfacing material and paint, and free shipping. A great feature on the site: the slow-mo video box showing different skate tricks from lip-level (found on bottom of homepage).
Buildaramp: Downloadable ramp plans. $17.95 – $19.95. Check out their free bank ramp plans to get a feel for their products.
Custom Skateboarding: Free blueprints without instructions or details.
Easy Half Pipe: DVD, plans and instructions on how to build a modular and transportable 4′ tall x 8′ wide half pipe. $29.95
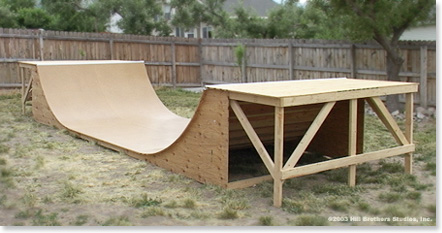
You can also find a large list of books, plans and videos for building ramps on Amazon.
On that list, two interesting things:
1. A portable, fold-out 33″ tall quarterpipe for those who don’t have space or time to build a ramp. Made from all-weather ABS plastic top with metal framework, it actually gets pretty good reviews. A clever idea, and decently priced too at $399. They also have a fold-out launch ramp for $179. (And another company sells a “full skatepark” of ramps and obstacles for $3999)
2. In the about Amazon search results for “ramp plans,” I was surprised to see a Video On Demand result for my TV show Catch It Keep It (#12 on the list). We built ramps on two episodes, the “Scooter Shooter” where we launched an Il Bello Fly scooter off a ramp on the roof of our workshop, and on the episode where we launched a car off a ramp into a makeshift living room.
Arduino RC Controlled Lawnmower Project
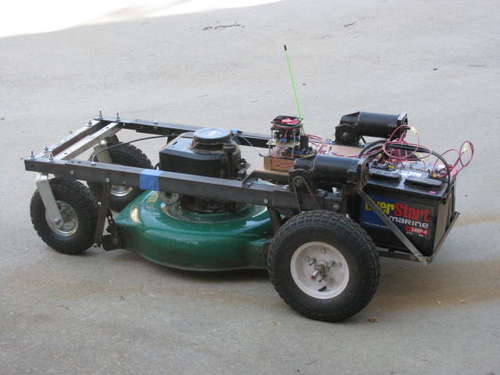
Using the guts from a push-mower, two wheelchair motors and a custom carriage, and some hand-built electronics, Instructables user Johndavid400 has created a radio-controlled lawnmower dubbed the Lawnbot4000. His detailed writeup is available here.
| Background:
Most R/C equipment comes packaged for a single specific use, which makes it easy to use but is very limited in what you can do with it. So using the Arduino as an interpreter between the R/C system and the motor driver, I can use any motor controller that I want (depending on the size of the motor and power required), reprogramming the Arduino to supply the required signals. What I ended up with: After successfully hacking a few R/C cars from the thrift store, I got bored driving them around the driveway and I was having a hard time convincing my wife that there was any usefulness in the revived toy car. So I decided it was time to make my biggest chore at home, a whole lot easier and actually put my Arduino to work, and thats how I ended up building an R/C lawnmower. While designing the lawnmower, I thought it would be cool to learn about the electronics that made it move, so I designed and built my own motor speed controller (or H-bridge) to power the lawnmower. I looked around at every H-bridge design I could find before deciding to go with a Mosfet h-bridge that uses both N-channel and P-channel Mosfets. I built several different motor driver boards for this project, the first two were on Radio-Shack perf-board and the next 4 were designed using EagleCad and etched to a piece of copper-clad PCB, using the toner-transfer method. The most recent board is the one I use to mow the lawn as it has the ability to stay cool even while operating for long periods of time (30-40 mins straight) at 10-20amps and 24vdc. FWIW, I had to burn up a lot of Mosfets to find this out. If you want to see any of my other motor controllers, go to www.rediculouslygoodlooking.com and check out the Mosfet shield.
Here is what I bought already assembled: Here is what I bought and assembled into the Lawnbot400 (as I call it): |
Make Your Own Mega-LED Bike Light
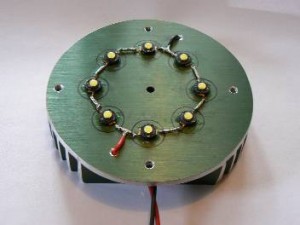
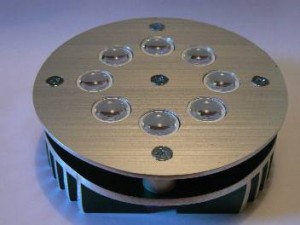
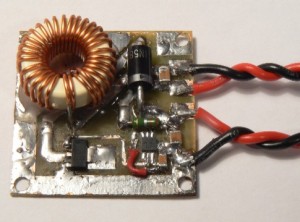
High-powered ultra bright LEDs, a series of lenses, and a home-built power supply. Aluminum heatsink and a flashlight casing, mounted to your bike for incredible night biking fun.
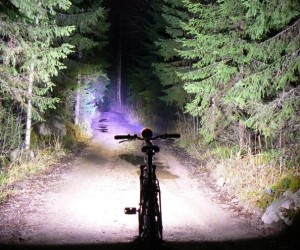
The instructions for this DIY bike light are written in Finnish, and the translation isn’t perfect, but the photos have enough guidance to help you put together a blindingly powerful setup that lights the trails to near daylight.
180 meters away from the birch stand out clearly. Power LEDs in these pictures is only 0.9 amps, because the available AA-size cells would otherwise run out too quickly. Now, on a single charge to drive about 1.5 hours and the light is still very adequate. Full power, or 2 amps of power I use a lithium battery that is also lighter.
A comprehensive list of other DIY LED bike lights can be found at yojimg.net.
Related: This is the best tail light I’ve found: the Blackburn Mars 3.0. The awesome amber side LEDs were the key selling point (not to mention it’s only $16). I’ve had mine four years and still running strong. And, I reviewed it in WIRED when I was working there (link).
Build a Six-Wheel-Drive ATV for Go Anywhere Fun
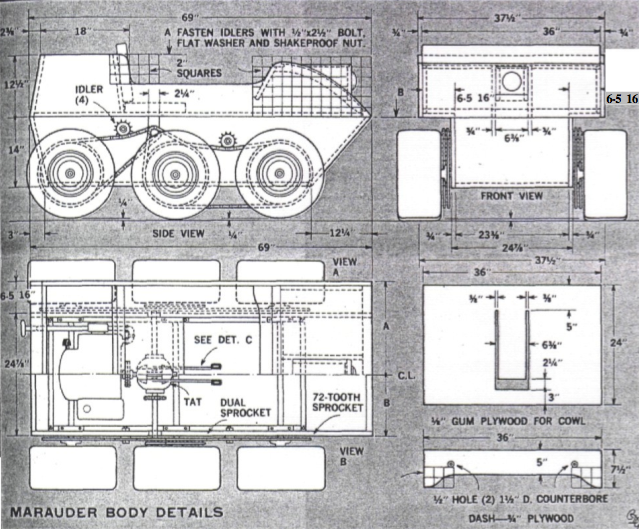
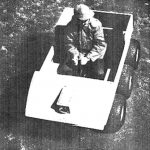
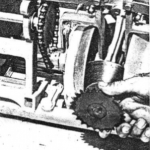
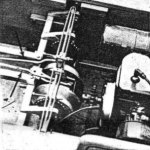
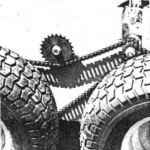
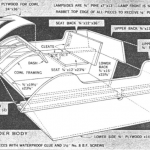
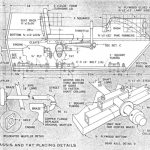
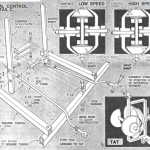
A step up from the go-kart that we all built as kids (and some of us still do…), this vintage DIY six wheeler is a great father-son project for cruising around the neighborhood and out into the trails. Uses a transaxle automatic transmission to act as a clutch, transmission, and differential all in one unit. Controls and steering are tank-like, two levers control the two sides of wheels. Seems that the TAT is the hardest part to source, but some searching suggests that an 1970 beetle may have used this unit.
Scanned PDF instructions from the original writeup in Mechanix Illustrated (January 1970) are posted on Vintage Projects.com. Sadly, I don’t think the $5 plans offered in the article are still available.
Trebuchet Calculator Tool – Model your Pumpkin Launching Design for Maximum Distance
Super cool program: Trebstar, a Mac and PC trebuchet modeling software, calculates the range and efficiency of your trebuchet design.
The program has various configurable parameters and animations, and also shows the forces on the different components of the trebuchet itself – lets you know what part might break when you build your masterpiece. A handy tool for aspiring punkin chunkers! And a quick reminder: watch me on Science channel’s Punkin Chunkin special this Thanksgiving. It’s awesome.
Download Trebstar 4.5 here
Unstuff it with StuffitExpander
Here’s a miniature trebuchet kit to let you understand the mechanics while throwing golf balls around the back yard (or office).
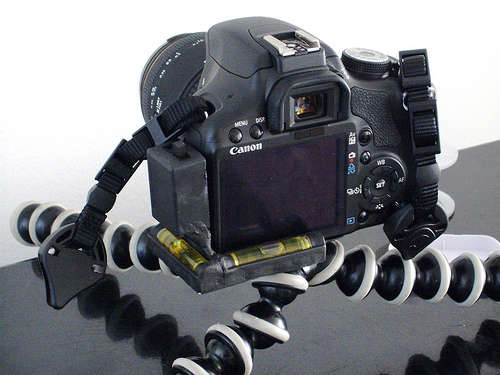
Bubble Level with LED Light Mod for Gorillapod (and Other Tripods)

I love my Gorillapod – it comes with me everywhere I go, camera bag, backpack or suitcase. The versatility of it extends beyond “turn-anything-into-a-tripod” – it’s also an amazingly entertaining toy for children, and some people have even looked to hack them into “helping hands” for soldering projects.
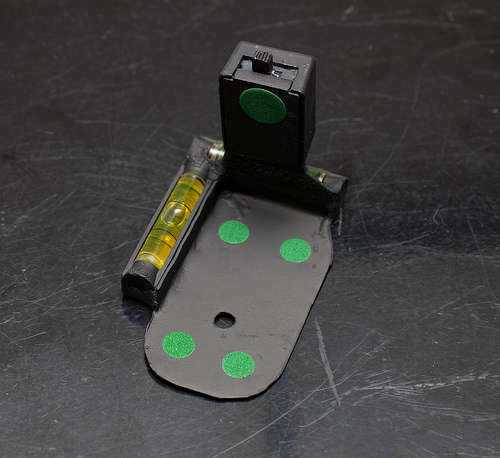
One thing with the G-pod though, I rarely get a perfectly level shot when using it. The alternative makes it worthwhile, but Instructable user Zomie took on that same hindrance and devised an LED-lit bubble level mount for his SLR Gorillapod. Cheaply found components make it an attractive addition to us nighttime photography fans.
Have you ever shot in low light conditions and noticed your shots were off level? Well I certainly have! I have been doing a lot of work lately with long exposure photography and when I am out in the field using a gorillapod I find myself running into this quite often.
I know I can buy a shoe mount camera level, but at night it is very difficult to see. I clearly needed to make my own, so please follow along in this instructable to see how to make your own. Here is a quick video walk through showing you what you can build by the end of this instructable.
Read the whole writeup: How to build a light up camera level for a DSLR
Lava Lamp MIDI Controller – Control Your Synthesizer
Brilliant project that uses a lava lamp to send randomly changing MIDI continuous controller signals. The creator uses it as a synthesizer controller on Reason and create some wonderfully unique sounds.
The basis of the project is a standard lava lamp (a large one will be easier to work with) and 12 light dependent resistors (“photocells”). I don’t even know what resistence mine are – they were cheap off ebay – the important thing is you can make pairs of the same resistance.
Check out the full set of instructions including Arduino code: Lava lamp MIDI controller (skriyl)
